

In this article: Learn a clear, step-by-step method for creating farmhouse-style door trim to give ordinary doorways a custom, timeless look.
If you’d like to see the full hallway makeover that inspired this trim project, check out our hallway makeover reveal referenced throughout this post (search for “hallway makeover reveal” on the site to view the full reveal).
One of the most dramatic updates in our otherwise plain hallway was adding simple farmhouse-style trim around each door. The original trim was serviceable but felt small and lacked character; swapping it for wider, craftsman-influenced molding transformed the space.
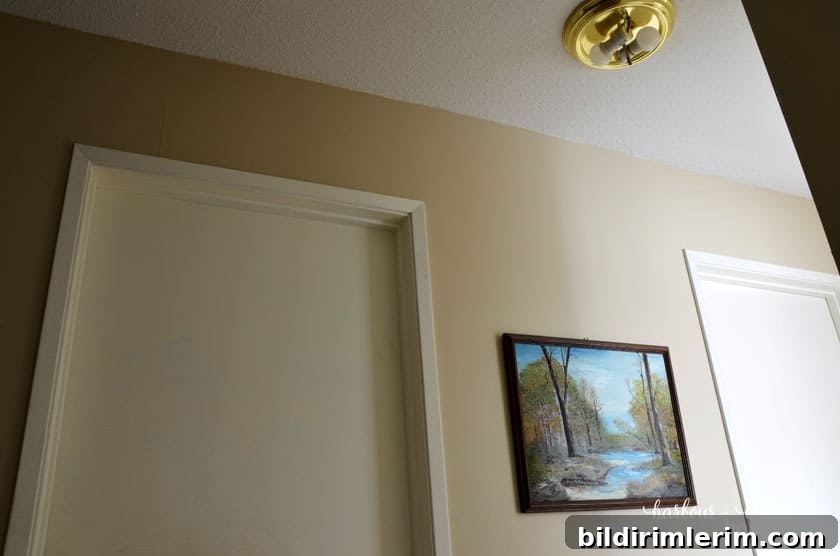
A short trip to the hardware store and a few straightforward steps later, the doors looked custom and cohesive with the rest of the hallway. Below are the materials, method, and practical tips to help you replicate this farmhouse door trim project.
How to Make Farmhouse Style Door Trim
Supplies Needed:
- 1 x 3 primed MDF boards for the door frame sides
- 1 x 4 primed MDF boards for the top header trim
- 1 x 2 primed MDF pieces for the decorative top trim to create a craftsman “U” profile
- Brad nails and an air brad nailer (or finish nailer), wood filler or spackling, caulk, and paint
- Measuring tape, miter saw (or hand saw and miter box), sanding block, pencil and level
Measure each doorway carefully before you buy materials. Primed MDF is a good choice for a smooth, consistent finish and faster painting; it gives a professional look without the extra prep of raw wood. Buy slightly more material than your measurements suggest—extra is useful for test cuts or mistakes.
Method
-
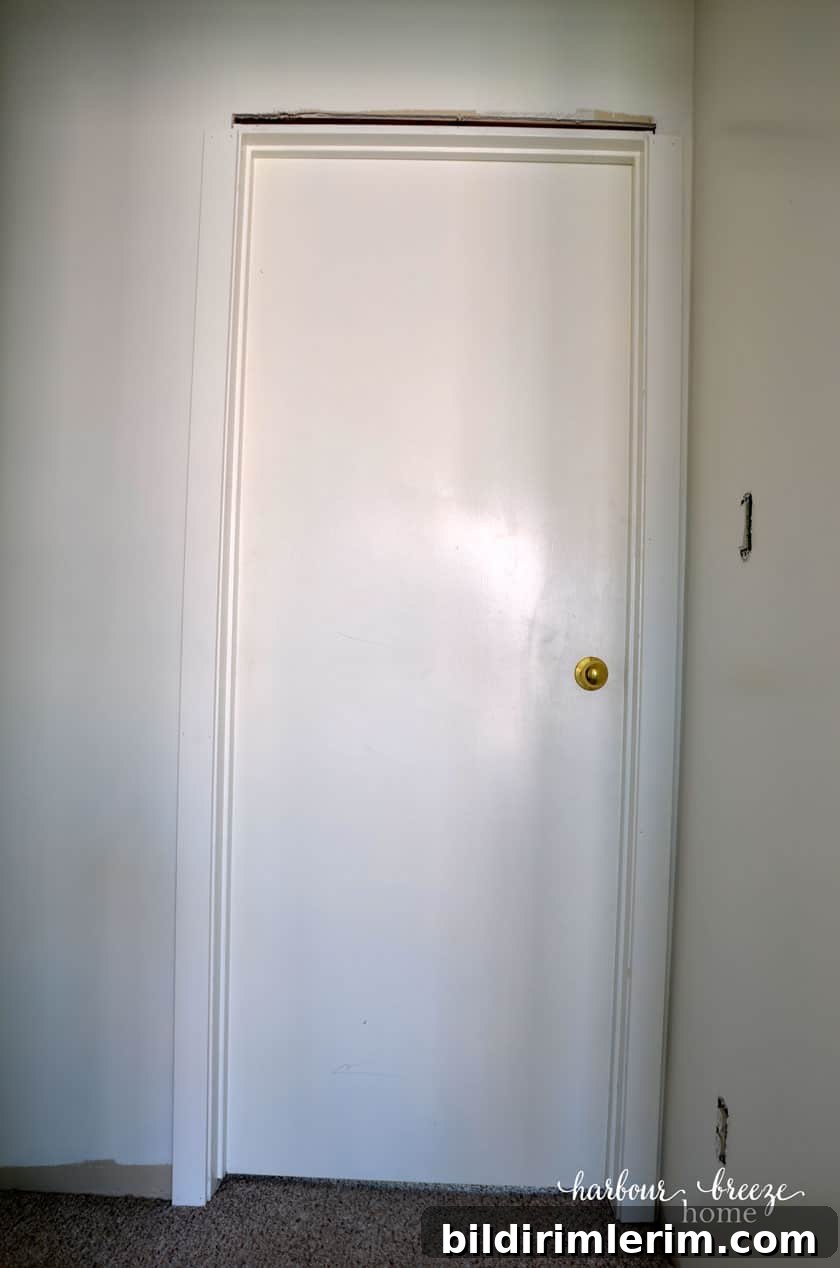
1. Attach the side trim pieces
Cut two 1×3 primed MDF pieces for each doorway to reach from the floor up to the top of the door frame. Dry-fit them first to ensure accurate measurements and to check how they align with the frame and floor. Use a level to keep the side trims plumb, then attach them with brad nails driven into the wall framing or into the door jamb. Leave nail heads slightly proud for filling later.
-
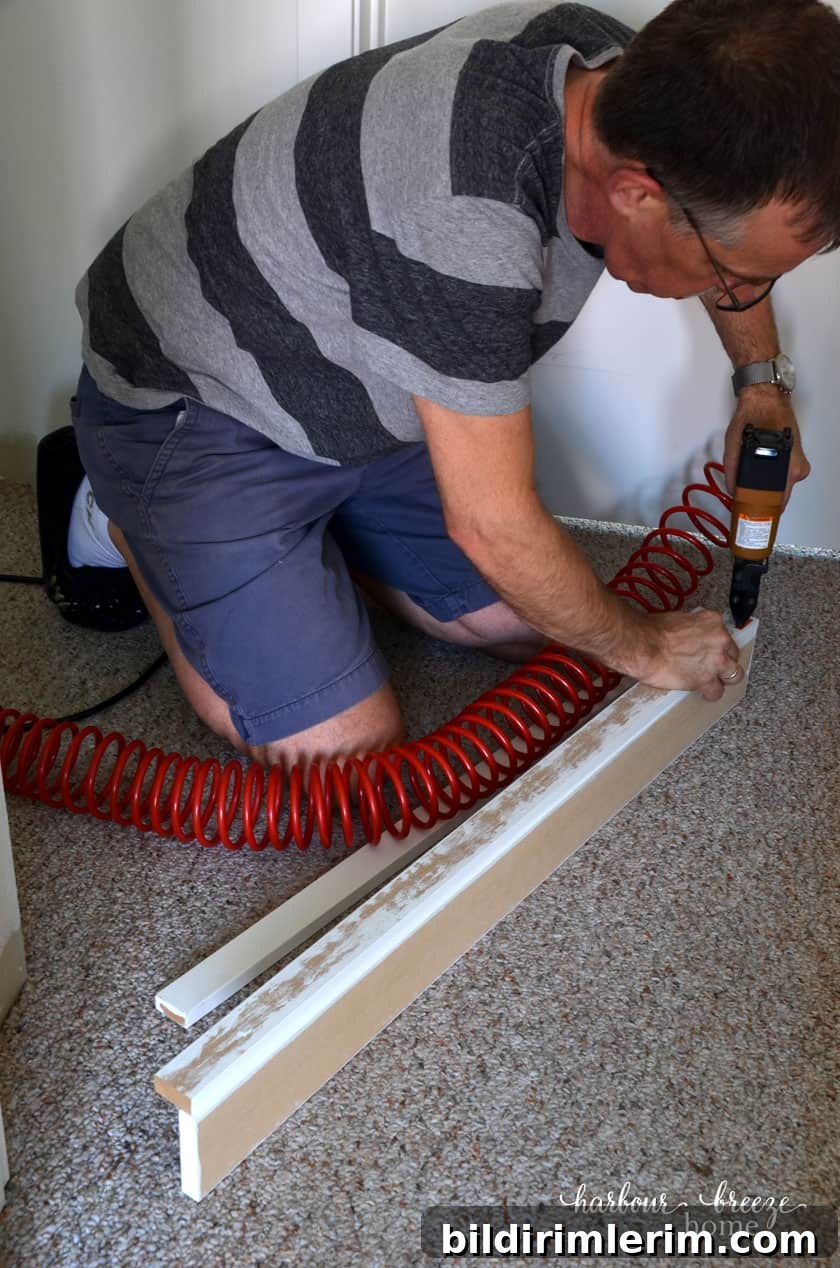
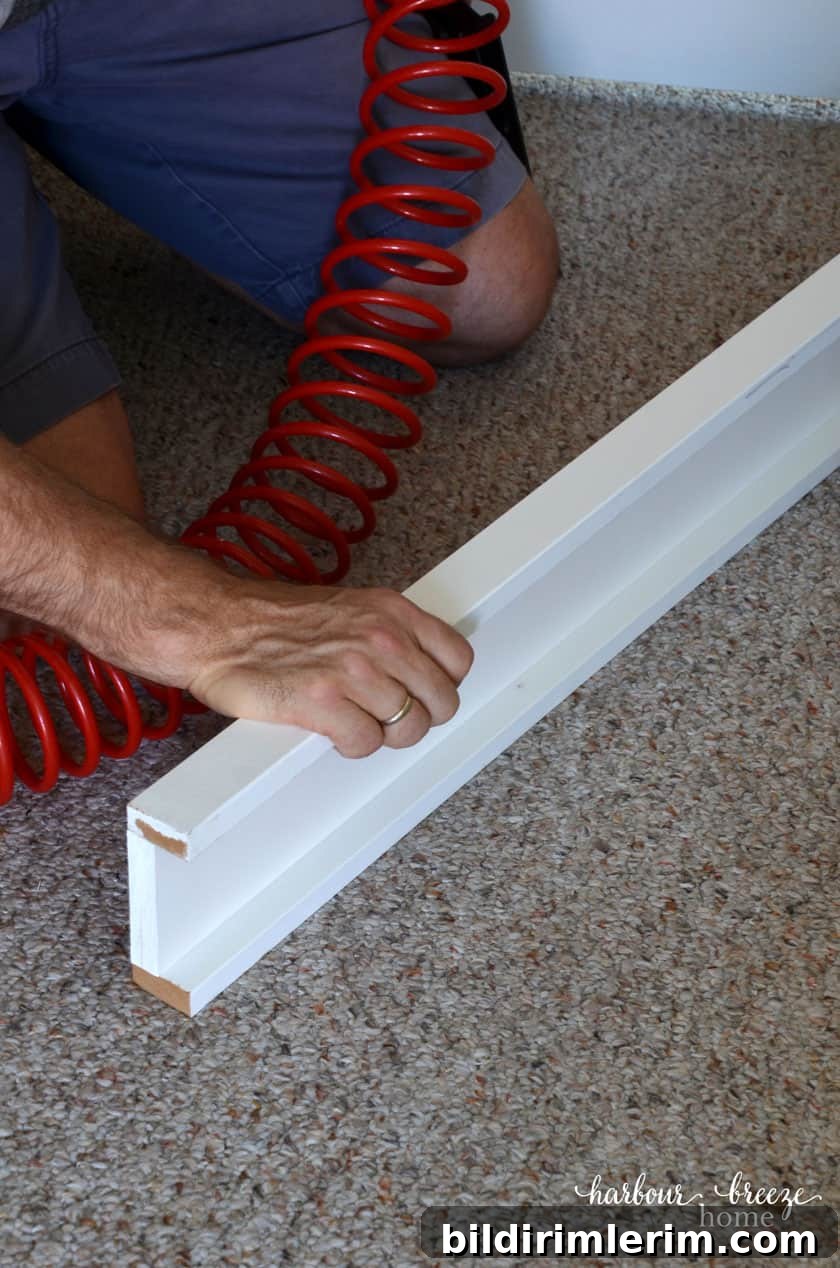
2. Create the decorative craftsman top piece
The signature look is a 1×4 top piece with two 1×2 strips attached to form a shallow “U” profile—one 1×2 near the top edge of the 1×4 and one near the bottom edge. It’s easiest to assemble and glue or nail the smaller 1×2 strips onto the 1×4 on a workbench before installing the whole assembly. This creates a crisp, layered craftsman appearance without complicated millwork.
-
3. Attach the top decorative piece
Position the assembled top piece across the top of the side trims and center it over the door opening. Secure it with brad nails through the 1×4 into the wall framing or jamb. Double-check level and alignment before final nailing. Once attached, fill nail holes and seams with wood filler or spackling and allow to dry.
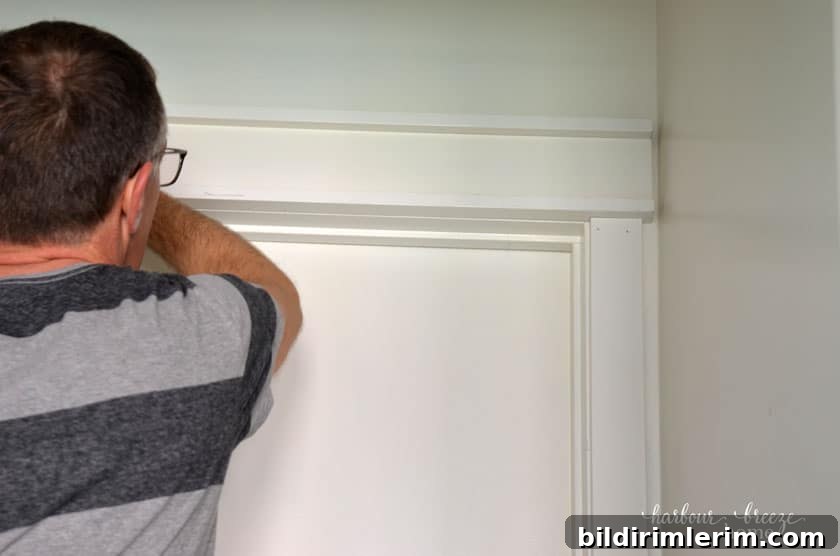
After the trim is installed and any gaps are filled, add baseboard where needed to match the updated trim and complete the look.
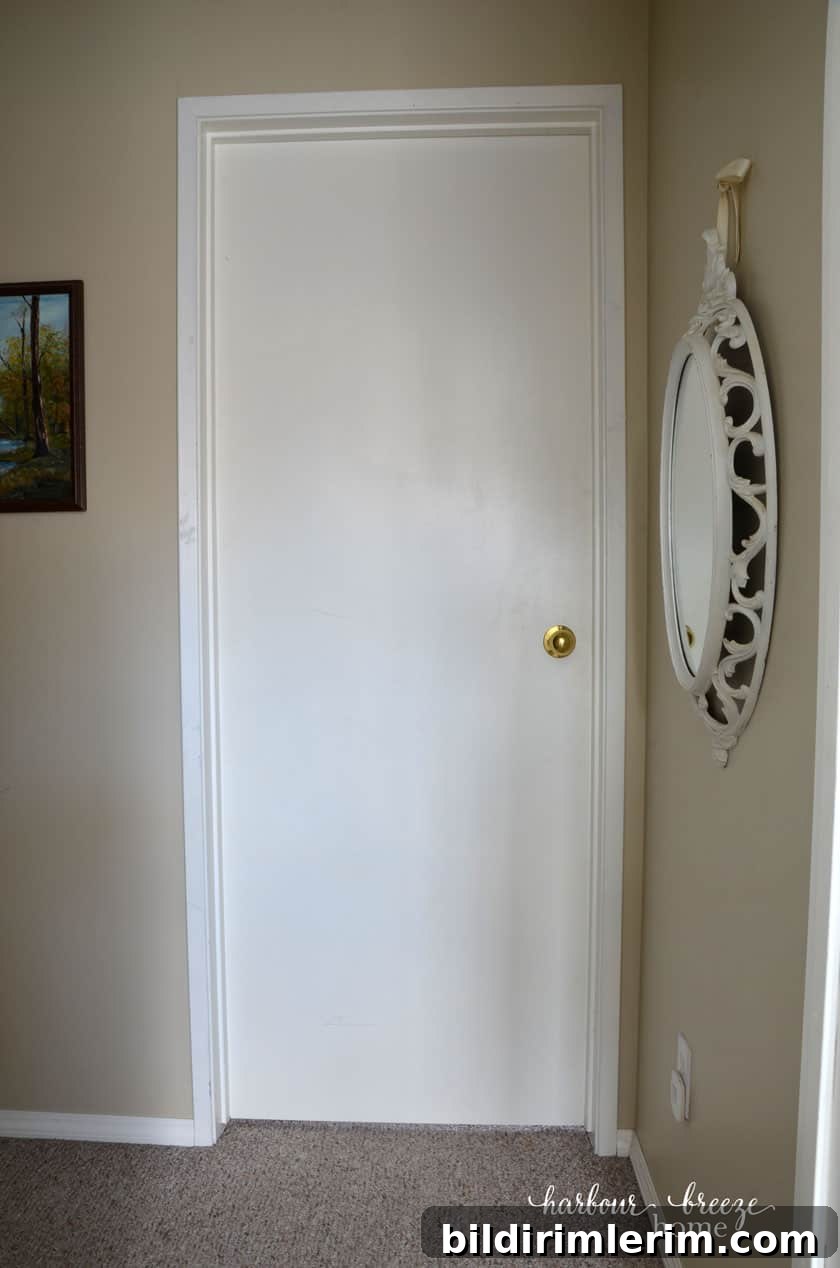
Below is the original trim before the update:
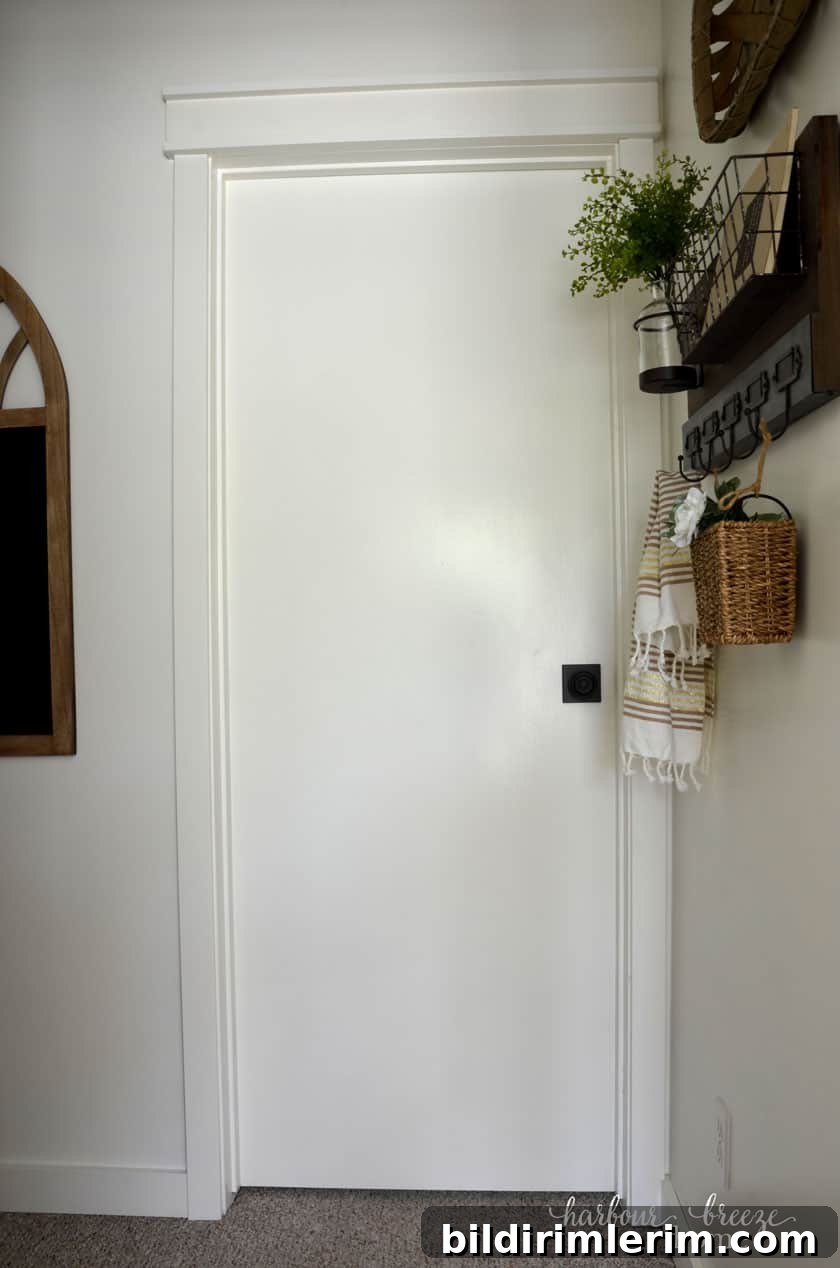
And here is the finished result after installing the farmhouse-style trim:
Additional tips
- Painting: Using primed MDF reduces prep time. We pre-painted all trim pieces with a semi-gloss white before installation for easier coverage. After installation, fill nail holes and seam gaps, then spot-prime and touch up with a final coat for a seamless finish.
- Filling and sealing: Use a lightweight spackling or filler to hide nail heads, and run a thin bead of paintable caulk along inside seams to eliminate visible gaps and ensure a finished, custom look.
- Proportions: If your door surround has more clearance, wider boards can create a bolder, more dramatic farmhouse look. Work within the constraints of your doorway and wall spacing when choosing board widths.
- Tools and safety: A miter saw speeds up precise cutting; always measure twice and cut once. Wear eye and hearing protection when cutting and nailing MDF, and follow proper tool safety procedures.
With a few common supplies and some careful measuring, you can achieve a clean farmhouse door trim that elevates the entire hallway. The project is approachable for a beginner and delivers a high-impact, timeless result.