
These DIY painted wood signs made with FolkArt Home Decor Chalk offer a colorful, cheerful way to fill empty wall spaces.
One of my favorite budget-friendly solutions for refreshing a room is paint. Applied to a wall, it can transform an entire space; applied to a piece of wood, it becomes custom art. For this project, I used a new-to-me line of chalk-style paint from FolkArt to create small signs for our main bathroom.
{Disclaimer: I received product from FolkArt for this post. My impressions and review are honest—if they offered a lifetime supply, I’d happily keep using it!}
DIY Painted Signs Using FolkArt Home Decor Chalk
Supplies Needed:
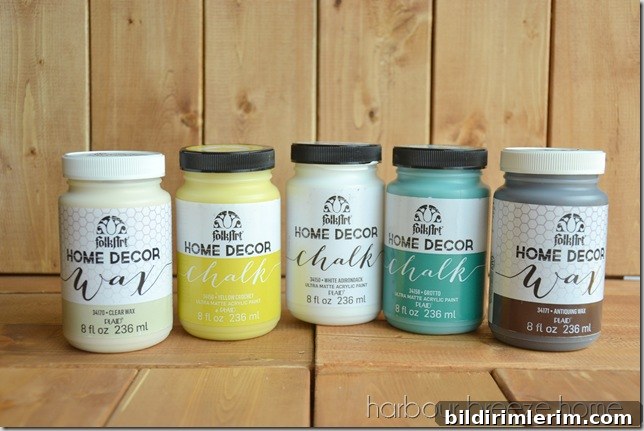
- FolkArt Home Decor Chalk paint (I used Yellow Crochet, White Adirondack, and Grotto)
- FolkArt Home Decor Wax (clear wax and antiquing wax)
- Wood pallet bases or assembled boards (prepared as a sign base)
- Wood stain for base boards
- Paintbrushes in various sizes
To start, I pulled a stack of prepped sign boards from the basement. My husband had already cut, stained, glued, and strapped the boards, so they were ready for paint. For reference, the original method I used to assemble boards is available in an earlier tutorial.
Our bathroom wall color is a soft Sea Salt blue, so I chose Yellow Crochet as a bright, complementary accent. I stirred the FolkArt Chalk paint well and applied it with a brush. The paint has a rich, slightly thick consistency and goes on smoothly—almost like butter—and provides strong coverage in one or two coats.
I transferred a favorite quote onto the painted board using graphite paper and a wooden stylus, then hand-painted the letters using thinned white acrylic paint and a small brush. Because the chalk-style paint provided a nice, toothy surface, I found it much easier to paint clean lettering—the acrylic slid across it in a controlled way that made “writing” with paint simple.
After the lettering dried, I dry-brushed a little white across the surface for a soft, worn look and added antiquing wax sparingly along the edges and in the board seams to emphasize texture and depth. Finally, I sealed the piece with clear FolkArt wax. The wax is liquid and easy to apply; the instructions recommend buffing after an hour. I wiped the surface with a cloth and ended up with a smooth, sealed finish rather than a high glossy shine—the color deepened slightly and the sign felt protected.
Because I enjoyed the process, I painted a second sign using Grotto as the main color and sealed it the same way. Placing the two signs together created a cheerful, coordinated vignette that complements the bathroom’s blue walls while adding a handcrafted touch.
If you want a more detailed step-by-step on making rustic painted signs, there are tutorials and videos that cover assembly, lettering techniques, and finishing tips. These paint and wax products are a straightforward way to create custom decor on a budget—perfect for filling wall space with personality and color.
Linking up with: Be Awesome Link Party