
DIY Striped and Layered Photo Frame: A Simple Wall Art Project
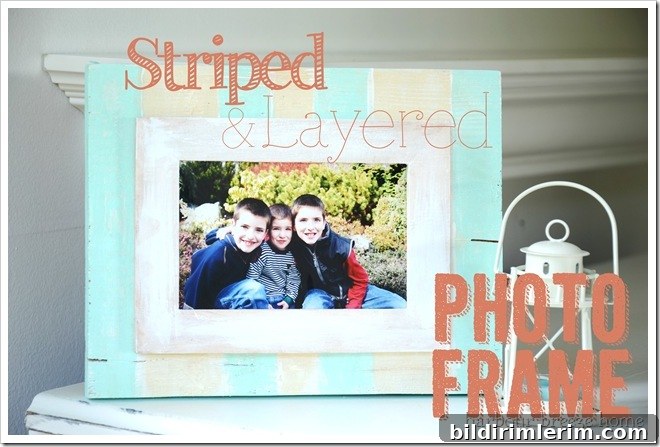
This week has been all about wall art, and today’s quick project is a Striped and Layered Photo Frame that adds depth, texture, and visual interest to any gallery wall. Layered frames and mats create a professional, custom look without the cost of custom framing, and this method keeps the top layer removable so you can change the photo easily whenever you like.
Why layered frames work
Layering different matting and textures adds depth to a photograph or print and helps it stand out from the wall. A layered look feels curated and intentional, and when you paint or distress the layers you can coordinate the frame with your decor. The challenge is keeping the top decorative layer attached while still allowing the picture to be changed. The simple hanging trick used here solves that problem with minimal hardware and no complicated fasteners.
Materials and basic tools
- Wood backing panel or board for the base
- A basic wooden picture frame (an inexpensive Ikea frame or thrifted frame works well)
- Acrylic or latex paint in your chosen colors
- Painters tape to create clean stripes
- Optional stain for a subtle wiped finish on the frame
- A small finishing nail or tiny hanger nail
- Sandpaper or a sanding sponge (optional, for distressing)
- Hammer and pencil
Step-by-step process
1. Prepare the wood backing: Sand the surface lightly if needed, then apply the base coat of paint. Allow it to dry fully.
2. Add stripes: Use painter’s tape to mask off stripes on the top layer. Apply a contrasting paint color and remove the tape once the paint is dry to reveal crisp stripes. Painter’s tape helps ensure clean lines and prevents bleeding.
3. Paint the frame: Give your inexpensive wooden frame a quick coat of white or another coordinating color. For added character, apply a thin stain and immediately wipe it off to achieve a soft, aged look. This wipe-on, wipe-off staining technique highlights grain and adds warmth without overpowering the painted stripes.
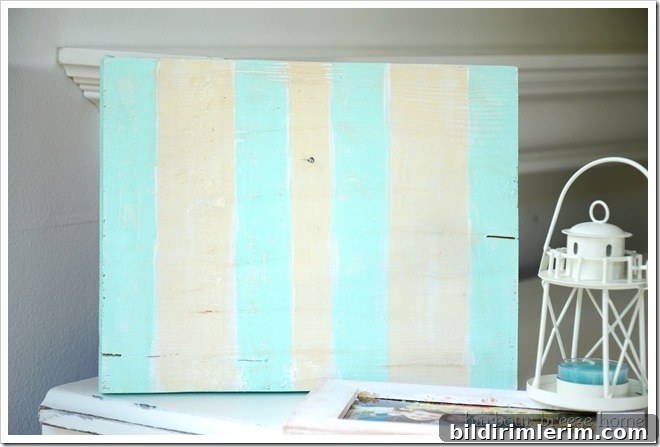
4. Mark the center: Once all painted pieces are completely dry, place the frame on the backing where the photo will sit and mark the center point. This is where you’ll insert a very small nail through the top layer.
5. Insert a tiny nail: Drive a tiny finishing nail into the marked spot on the top layer. The nail should protrude slightly enough to catch the hanger that’s already attached to the back of the frame.
6. Hang the frame: Hang the assembled layered frame on the wall by setting the frame’s built-in hanger onto the small nail in the backing. Because the top decorative layer is hung on that nail, you can lift the frame off to change the photo when desired, while the layered look remains intact on the wall.

Tips, variations, and finishing touches
- Color choices: Use complementary or tonal colors for a subtle look, or high-contrast colors for a bold graphic statement.
- Texture: Try light distressing with sandpaper on the edges of the stripes or frame to create a vintage or rustic feel.
- Multiple sizes: Make several layered frames in different sizes to create a cohesive gallery wall with visual depth.
- Hanging alternatives: If your wall material doesn’t hold a small nail well, use a micro picture hook or an adhesive metal hook rated for your frame’s weight.
- Photo changes: Because the frame itself hangs from the small nail, you can remove the frame to swap photos without disassembling the layered backing.
Related projects and inspiration
If you missed earlier projects in this series, explore other handmade wall decor ideas such as a gallery wall reveal, a light reflector arrow sign (which demonstrates the basic painting method used here), and a beach cottage faux picture frame. These projects use similar paint and finishing techniques and pair nicely with the striped and layered frame to build a cohesive display.
This is a quick, low-cost project that yields a custom, layered look and keeps photo changes hassle-free. With a few paints, tape, and an inexpensive frame, you can create a polished accent piece that complements any room.