
Patio Makeover: The Before and After Story
I’ve been sharing the progress of our patio makeover in small updates all week. The funny thing about blogging is that one full day of work can turn into a week’s worth of posts — and that’s exactly what happened here! 
If you’ve been following along, here are the separate pieces of the project you may have already seen:
-
The yard tour — a look at the outdoor space and how we imagined transforming it
-
The flower bed makeover — planting, shaping, and refreshing the beds around the patio
-
The DIY outdoor table and seating area — a quick build that brought instant function and charm
…and the finishing touch:
-
The front door update — a small change that made a big difference for the overall curb appeal
Up to now, you’ve seen the individual steps. What I hadn’t shown was the complete scene — the full patio revealed once everything was in place. Here’s the final picture, along with the original “before” for comparison so you can see how the elements came together.
Before:
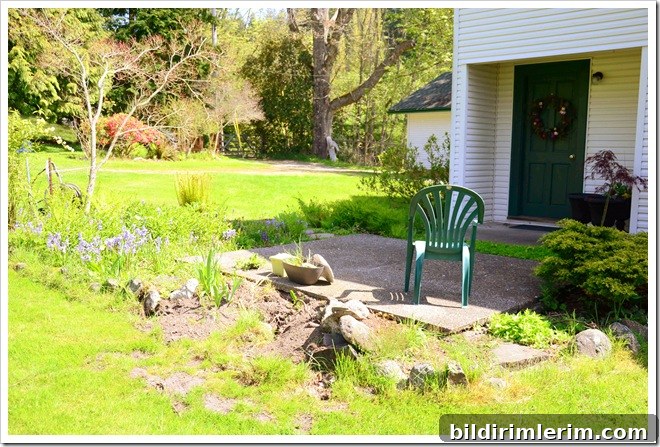
After:
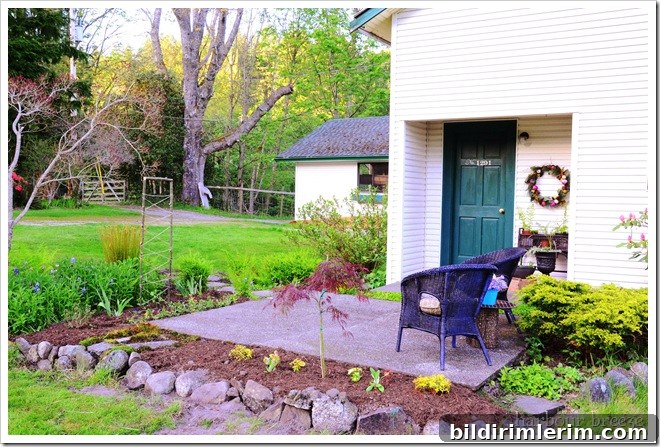
This makeover focused on a few key priorities: creating a welcoming seating area, simplifying and refreshing plantings around the patio, and making a few intentional cosmetic updates so the space feels cohesive and inviting. The DIY table and seating provided immediate utility and a focal point, while the refreshed flower beds and front door helped tie the patio into the rest of the yard and home exterior.
A few practical takeaways from this project:
-
Plan the main seating arrangement first. Once you know where people will sit and congregate, it’s easier to place plants, lighting, and accessories around that core zone.
-
Small, quick DIY pieces can have a big visual impact. A custom table or bench doesn’t need to be complex to add style and functionality.
-
Refresh plantings with a mix of textures and heights for a fuller, more intentional look. Even trimming and reshaping existing beds can make a dramatic difference.
-
Cohesion matters: pick a consistent color palette and material choices for cushions, planters, and small decor items so the entire outdoor room reads as one space.
{P.S. For anyone interested in photographing exterior spaces, I learned an important lesson while working on this project: evening light, right before sunset, is often the best time to shoot the outside of a house. The low, warm light reduces harsh shadows and brings out color and texture beautifully. It made a noticeable difference in how the patio and surrounding landscape appeared in these photos.}
If you enjoyed seeing this progression, check the individual project updates in the same series — the yard tour, the flower bed refresh, the DIY outdoor table and seating, and the front door update — to get more details and step-by-step photos from each part of the makeover.
Linking to: Remodelaholic, At the Picket Fence