Patio Makeover: A Complete Before and After Reveal
I’ve been sharing our patio makeover little by little over the past week — the kind of project that gives a blogger an entire week’s worth of posts from a single day of work. It’s been fun to document the process, and now I’m ready to show the whole transformation in one place so you can see how all the pieces fit together.
Throughout the week I covered several elements of the refresh:
- The yard tour — a look at the overall outdoor space and what we wanted to improve
- The flower bed makeover — planting and reshaping beds to add color and structure
- The DIY outdoor table and seating area — simple, budget-friendly furniture to create a cozy spot
- The front door makeover — a small update that boosted curb appeal and set the tone
Each of those smaller projects contributed to the larger impact. Taken together, they transformed the patio from a neglected corner into a welcoming outdoor living area that’s both functional and attractive. Below you’ll find the before and after images so you can compare the results and take inspiration for your own space.
Before:
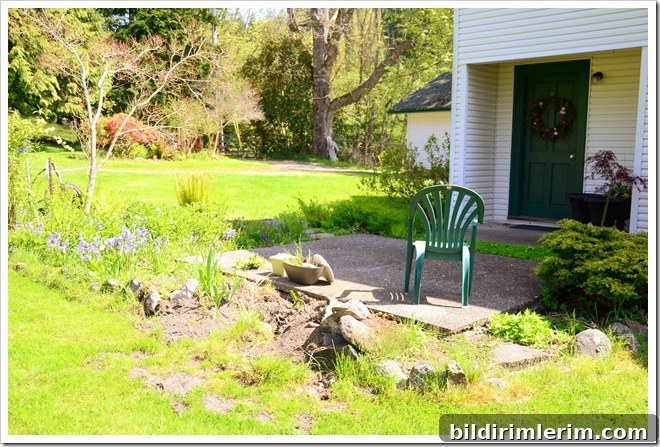
After:
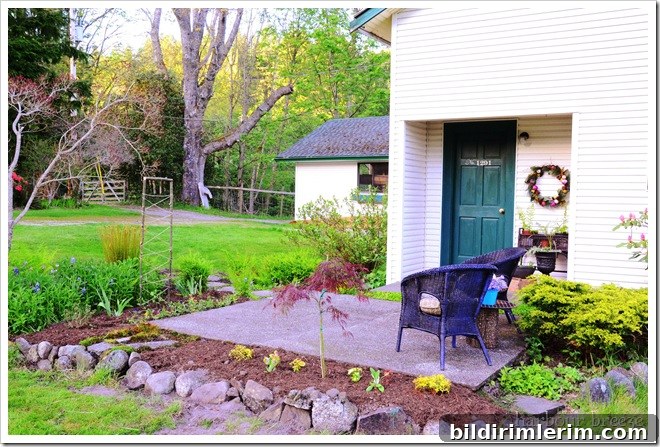
The makeover focused on a few straightforward goals: improve functionality, increase visual appeal, and make the space comfortable for everyday use. To achieve that I prioritized three changes:
- Define zones: I created distinct areas for dining, relaxing, and gardening so the patio feels organized and purposeful.
- Add texture and color: New plants, planters, and small décor elements bring layers of texture and seasonal color to the space.
- Simple, practical DIY furniture: A budget-friendly outdoor table and seating area provide a durable, attractive focal point without a hefty price tag.
Small updates can make a big difference. For example, freshening up flower beds and adding a cohesive seating arrangement instantly make the patio feel cared for. The front door update tied the whole look together and improved curb appeal, making the entire exterior feel more inviting.
Photography tip: For anyone documenting their own outdoor projects, I discovered that the best time to photograph the exterior of your house is in the evening just before sunset. That golden-hour light minimizes harsh shadows and gives colors a warm, flattering glow. Shooting at that time made the textures and colors of the plants and furniture look their best and helped the final images feel more cohesive.
Putting together a patio makeover doesn’t require a full professional overhaul. With a little planning, some DIY solutions, and thoughtful plant choices, you can create a space that looks intentional and welcoming. Start with what matters most to you — whether that’s a comfortable seating area, dining space, or beautiful garden beds — and build the rest around that core idea.
If you’d like to recreate a similar look, focus on these practical steps: assess the layout, choose multipurpose furniture, plant a mix of perennials and seasonal blooms for continuous color, and use consistent finishes and accents to unify the space. Even modest investments in the right places yield a high return in enjoyment and curb appeal.
Thanks for following along with the patio transformation. I hope the before-and-after photos and the project details inspire you to tackle your own outdoor refresh.
—
Linking to: Remodelaholic, At the Picket Fence