Blogging has pushed me to become a better photographer. It’s both enjoyable and, at times, a little frustrating — sometimes both at once. I find myself constantly inspired by the images I see on other blogs and in magazines, and that inspiration often brings with it a bit of envy when I can’t yet recreate the same results. The biggest lesson I’m learning is to be persistent: keep taking photos, keep experimenting, and keep learning. That’s the beauty of digital photography — you can shoot freely and delete what doesn’t work without spending extra money.
Recently I had an “ah-ha” moment while photographing my fall living room. Lighting has always been the most challenging element for me. For single objects I can move them around to find the best light and try different angles, but it’s obviously harder to reposition an entire room. To learn more, I decided to run a small experiment and photograph the same room at different times of day to find the “sweet spot” for natural light. I didn’t use flash for any of the shots. {All pictures are unedited.}
Here was the room in the early afternoon {f/11; ISO 1000; 1/30}:
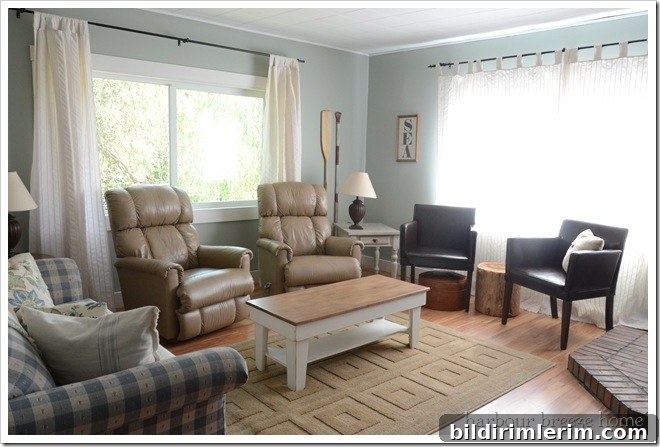
…in the evening just before sunset {f/18; ISO 3200; 1/13}:
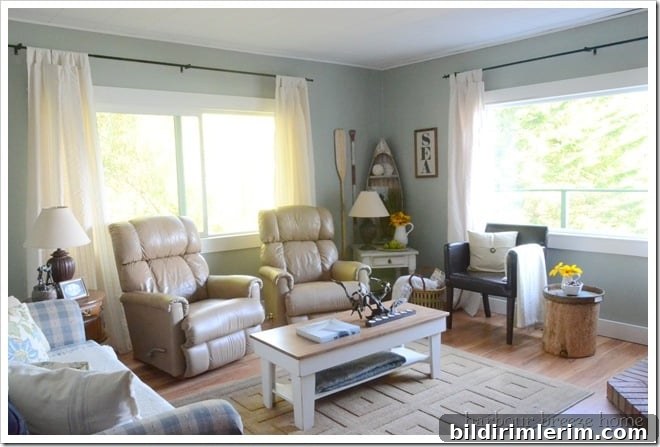
The next morning at about 9:30 a.m. {f/4.5; ISO 200; 1/80}:
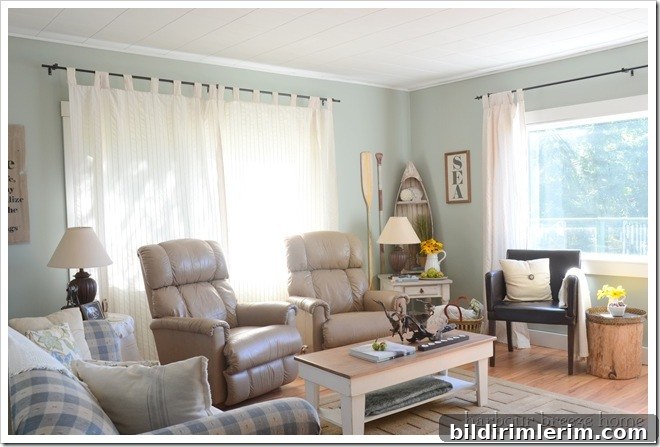
And one hour later {f/10; ISO 200; 1/8}:
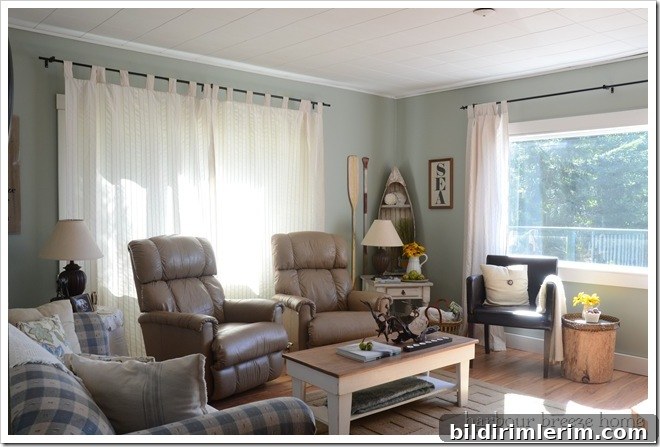
The clear winner for this room turned out to be 9:30 a.m. The light was bright and pleasant, though I did need to close one set of curtains to diffuse a patch of direct sunlight that created harsh highlights. For the last two photos I finally set up a tripod and locked the ISO at 200, which noticeably improved clarity and reduced noise. That’s something I should probably do more consistently.
I’ve included the exposure numbers for readers who pay attention to those details — I’m learning to interpret them more confidently. I shoot in Aperture Priority mode, which lets me choose an f-stop and then adjust exposure compensation when needed. Playing with aperture, shutter speed, and ISO in different lighting conditions has helped me understand how those settings interact and how they affect the mood and sharpness of an image.
If you want to improve your room or interior photography, here are some practical, easy-to-apply tips I discovered while doing this experiment:
- Try shooting the same scene at multiple times of day to find the most flattering light.
- Avoid the onboard flash for natural, pleasing results—use natural light whenever possible.
- Use a tripod when ISO needs to be low and shutter speed becomes slow; it keeps images sharp.
- Control direct sunlight with curtains or diffusers to prevent harsh highlights and blown-out areas.
- Shoot in Aperture Priority to control depth of field while letting the camera choose shutter speed, and use exposure compensation to fine-tune brightness.
- Don’t hesitate to delete the shots that don’t work; experimentation is part of learning.
For further reading and step-by-step tips, I’ve gathered a few resources that helped me grow as a photographer. Titles that inspired me include Miss Mustard Seed’s “Growing as a Photographer,” Dear Lillie’s “Easy Tips for Photographing Food,” and My 3 Boybarian’s “31 Days of Photo Tips.” These sources offered practical guidance on composition, lighting, and everyday techniques that are useful for improving blog photography.
Photography is a skill you develop through practice and observation. Keep shooting, take notes about settings and conditions, and pay attention to how light changes a scene. With time and persistence, your photos will reflect the vision you see in your head.