I remember the days when hunter green felt like the height of style. It photographed beautifully, looked striking in magazines, and seemed to suit other people’s homes perfectly.
So when I finished wallpapering the lower half of our master bedroom in that deep green, I was confident I’d made the right choice. Three minutes after stepping back, though, the realization hit: this color wasn’t really me.
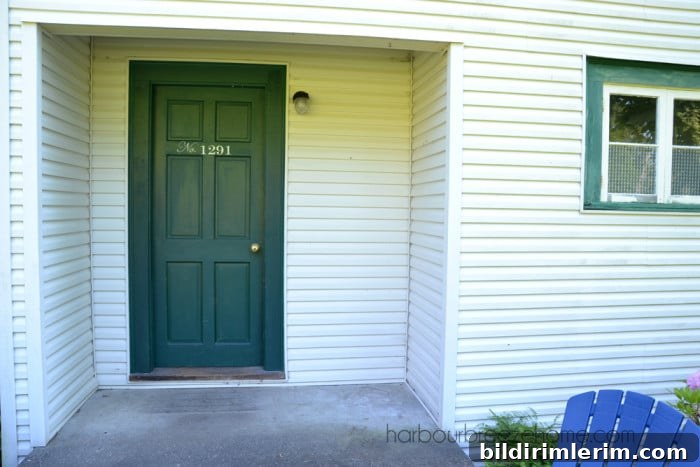
To make matters worse, hunter green crept everywhere in our house. The trim, the deck, the front door, the gutters on the garage, even the little guest cabin roof in the yard wore the same deep tone. At first I managed to ignore it and pretend it was part of the house’s charm. But that strategy only lasted so long.
Take a look at the window on the right in the photo: the trim needs attention. The idea of repainting the entire house trim feels overwhelming. I don’t have fond memories of the marathon sanding and painting sessions from summers spent helping my sisters restore our family’s barn—those days left me with a lasting aversion to long prep work, even though we had fun and laughs between the chores.
When working with old, weathered wood, the preparation is the hardest part: scraping, sanding, cleaning, and priming demand time, patience, and elbow grease. It isn’t glamorous, and it’s not something I look forward to doing across every fascia board and window casing around the house.
Still, if I was going to invest the time and energy into a full trim refresh, I wanted a color I truly loved. I decided to seek professional advice and visited our local Benjamin Moore store to talk to the salesperson I trust. I showed her photos of our house and explained my dilemma with the prevailing green.
Within minutes she had several swatches in her hand—suggestions that would work with our home’s style and sunlight. That quick, confident response is exactly why I go back to her every time. I took the swatches home and studied them in different light throughout the day to make sure the choices felt right when the sun moved across the yard. After living with the samples for a few days, I returned to the store and picked the paint that finally felt like the right step forward.
She emphasized what I already suspected: preparation is critical. “Missy, you must not skip a step,” she warned, and I agreed. Proper prep—removing loose paint, sanding rough spots, cleaning surfaces, and applying the right primer—will make the final paint job last longer and look professional. Hearing that reminder made the project feel more manageable because it gave me a clear checklist to follow.
Rather than attack the entire house at once, we decided to start small and build momentum. I chose a section that could be completed over a weekend so I could see tangible progress quickly and regain enthusiasm for the larger task. The front door was the obvious place to begin: it’s central to the home’s curb appeal and a spot where a fresh, well-chosen color can make a strong statement.
Painting the front door first also felt like a low-risk test for the new color scheme. If it breathed new life into the entry and set the tone for the house, the motivation to continue with the trim would follow. Over the next few days I’ll be sharing how the prep went, what steps we prioritized, and how the new color transformed that one small but meaningful element of the house.
For now, I’m relieved to have a plan and the right paint in hand. The idea of tackling the rest of the trim still makes me a little nervous, but breaking the work into manageable pieces—starting with the front door—transforms an impossible-seeming job into a series of achievable projects. Check back tomorrow and I’ll tell you how the first weekend went and what I learned from doing the door.