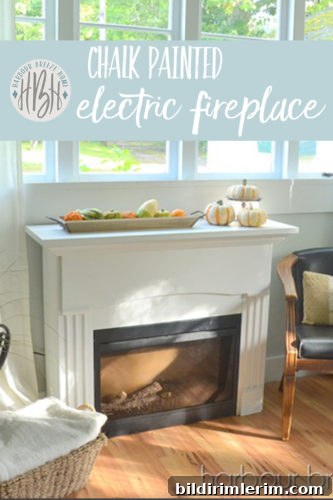
Customize an electric fireplace to match your style with this clear, step-by-step guide to painting an electric fireplace.
I’ve read many articles about the benefits of chalk-style paints and have tried them on smaller pieces using both homemade chalk paint and commercial chalk paints. This time I wanted to tackle a larger project and see how a clay-based, chalk-type paint would perform on an electric fireplace.
Along with my curb-side find, I discovered a Canadian-made line of chalk-style paint that was perfect for this makeover.
Related Articles: How to Paint a Bookcase with Cottage Paint; Painted Wooden Step Stool
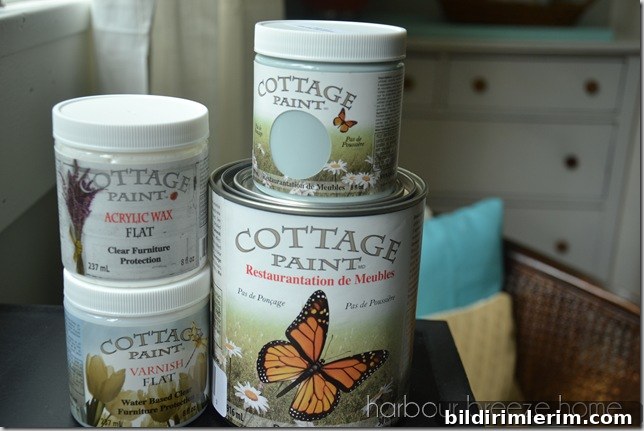
Cottage Paint is a clay-based paint and offers a more affordable option than many other chalk-style brands. I found a local supplier near my Vancouver Island home and was eager to try it on this project.

3 Easy Steps to a Beautifully Painted Electric Fireplace
This post contains affiliate links. If you purchase through one of the links below, I may receive a small commission at no extra cost to you.
Supplies Needed to Paint an Electric Fireplace:
- Cottage Paint in Cloudy Sky color (or your preferred clay-based chalk paint)
- 150 grit sandpaper block
- Painter’s tape
- Clean rag or tack cloth
- Good-quality paintbrush (a short, angled or small trim brush works well)
- Cottage Paint Acrylic Wax in matte finish (or a compatible acrylic wax/sealer)
- Wax application brush (a soft brush designed for wax or sealants)
- Soap bar such as Sunlight to clean brushes
1. Prep the fireplace by scuffing the surface with 150 grit sandpaper.
Although some products claim that no sanding is necessary, lightly scuffing a shiny or factory-finished surface improves adhesion and helps the paint stick. Focus on smoothing away any glossy finish rather than removing material. After sanding, wipe the piece thoroughly with a clean rag or a tack cloth to remove dust and particles. If your fireplace has a black inner box or electronic components, protect them carefully with painter’s tape so paint won’t get where it shouldn’t.
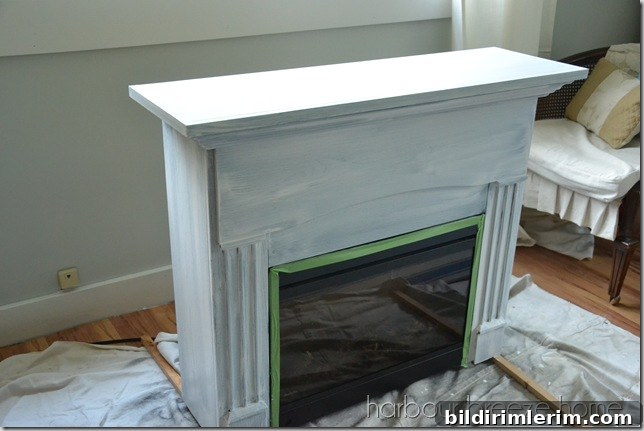
2. Apply paint—use as many coats as needed and allow proper drying time.
Cottage Paint stuck well to the wood and provided good coverage, but darker surfaces can require more than the two coats often recommended on the can. Apply thin, even coats and allow each coat to dry fully before adding the next. Thinner coats build up a smoother finish with fewer drips. For very dark or heavily stained pieces, consider using a stain-blocking primer first to reduce the number of color coats needed.
3. Seal with Cottage Paint’s acrylic wax finish.
Not all chalk-style paints and finishes are the same. Cottage Paint’s finish is an acrylic-based wax product—water-based rather than true paste wax—which behaves differently and does not require the same buffing process as traditional waxes. Work in small sections when applying the acrylic wax, brushing it on evenly and removing any excess according to the product instructions. This sealer protects the paint and makes the surface easier to clean.
If you’re new to this particular brand, reviewing the manufacturer’s application steps or a short tutorial can be helpful to understand drying times and the best method for applying and finishing the acrylic wax.
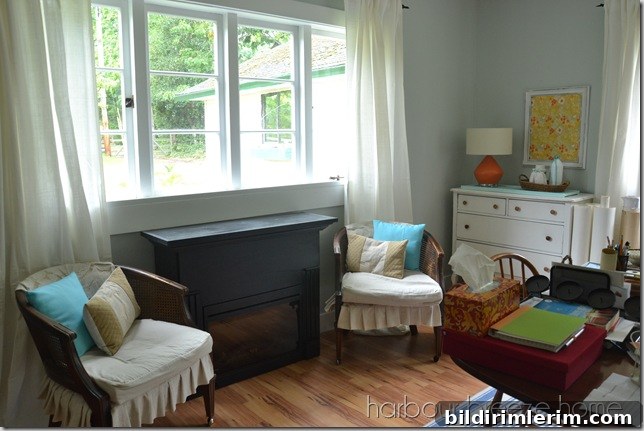
The transformation dramatically improved the look of the electric fireplace. Here it is before the makeover:
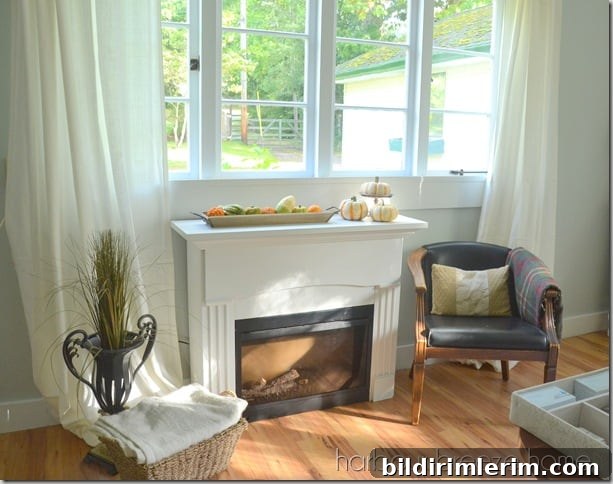
And here it is after painting and sealing:
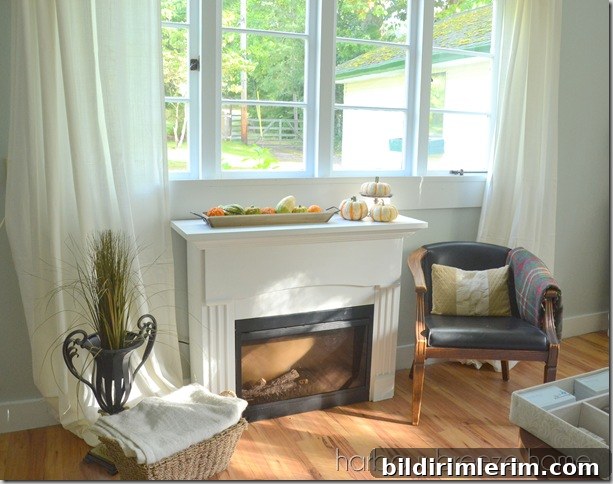
Having a small mantel to style is a bonus—simple seasonal decor, framed photos, or a mirror instantly make the area feel finished.

If you don’t come across a curb-side fireplace to update, there are many stylish white and neutral electric fireplace units available that can add a warm, farmhouse-inspired focal point to a living room. Painting an existing piece is a budget-friendly way to refresh a room and create a custom look that suits your decor.