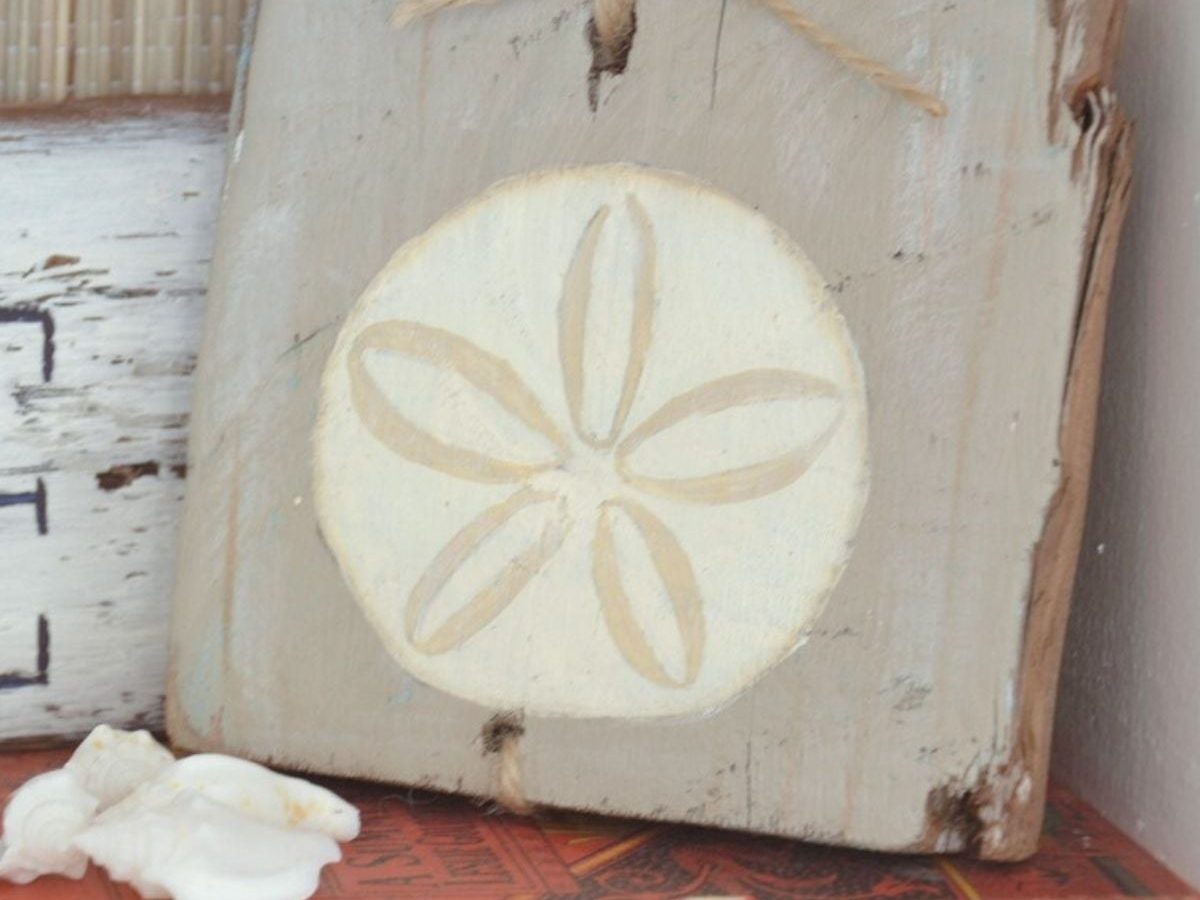
Turn a simple piece of driftwood into stylish coastal decor—this easy sand dollar painting can be hung on the wall or displayed on a shelf.
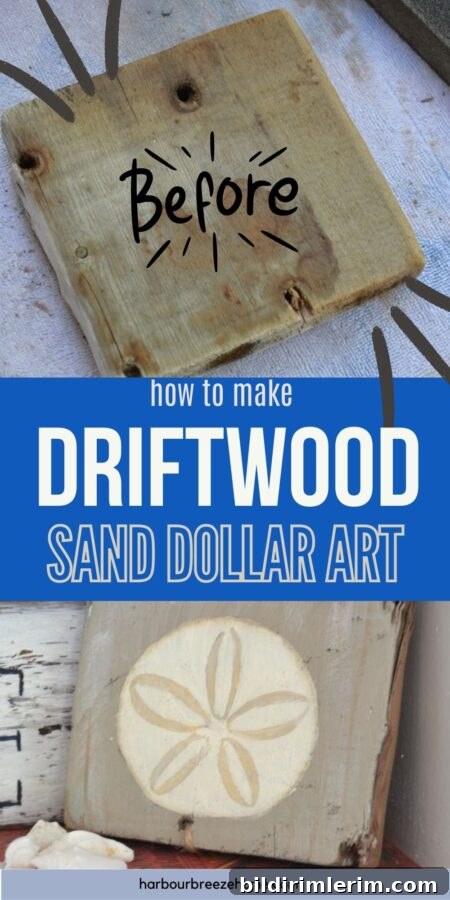
We are lucky to live near several beautiful beaches, and I enjoy bringing a bit of that seaside feel into the home. This project began with a small, weathered piece of driftwood I found on a walk. Its worn texture and the old nail holes gave it character and made it an ideal base for a simple, beach-inspired painting.
When I started, I used a sand dollar outline I had saved as a reference and adapted it to fit the shape of the wood. I relied on basic decorative painting techniques—layering a neutral base coat, sketching the design, and adding subtle shading and highlights to suggest depth and natural wear.
I adjusted the template slightly to suit the driftwood’s irregular surface, keeping the design simple and understated so the wood’s texture would still show through. A lightly painted sand dollar feels more authentic and complements a coastal aesthetic better than a perfectly uniform image.
Here is a concise step-by-step approach I used, which works well for small driftwood pieces:
- Clean and prepare the wood: brush away dirt, sand any rough edges, and remove loose splinters. Wiping it with a slightly damp cloth helps reveal the grain.
- Apply a thin base coat: a soft, sandy neutral or pale blue provides a coastal backdrop. Thinning acrylic paint slightly lets some of the wood grain show through for a natural look.
- Sketch the sand dollar: use a pencil or a very light paint wash to outline the design. Keep the central star pattern and the five petal-like shapes proportionate to the board’s dimensions.
- Paint the sand dollar: use a small brush for the central details and a slightly larger one for soft shading along the edges. I kept the tones muted—off-white, warm beige, and a touch of gray for shadow.
- Add texture and distressing: lightly scumble a dry brush over areas to blend the edges and create an aged effect. A very fine sanding after the paint dries can also soften lines and integrate the painted area with the wood surface.
- Seal and finish: protect the piece with a matte or satin sealer to preserve the look without an overly glossy finish. Let the sealer cure fully before handling.
- Attach hanging cord: I wove a length of jute through the existing nail holes and tied it at the top so the driftwood could be hung or simply draped over a shelf for a casual display.
Once finished, this small piece of abandoned driftwood became a charming accent tucked into the corner of my living room bookcase. The painted sand dollar reads as coastal and simple, while the natural texture of the wood keeps the piece grounded and authentic.
More Driftwood Decor Ideas
- Driftwood pieces styled to evoke coastal and nautical themes—use anchors, shells, or painted lettering for a personalized touch.
- Hand-painted driftwood welcome signs that pair weathered wood with simple, bold typography for an inviting entry display.
- Driftwood displays in bookcases or on shelves, mixed with books, candles, and small shell collections to create a layered beach vignette.
- Explore additional driftwood decor concepts such as small wall hangings, clustered artwork, or multi-piece arrangements that play with texture and negative space.
Tips and variations: experiment with different paint finishes—matte keeps the coastal look soft, while a satin finish offers slightly more depth. Try adding tiny accents like a real shell fragment, a small piece of sea glass, or soft linen ribbon instead of jute for a different style. For larger driftwood boards, repeat the motif or create a sequence of small painted elements to maintain balance across the surface.
A small project like this is quick, low-cost, and full of creative opportunity. Whether you keep the design minimal or embellish it with additional coastal details, painted driftwood makes a warm, personal addition to beach-inspired interiors.