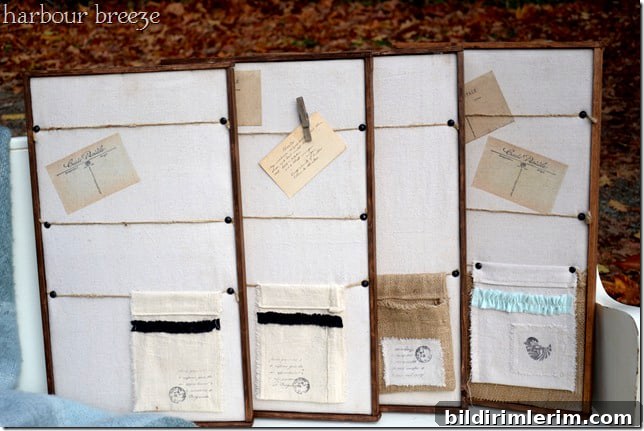
Create your own rustic message board inspired by the relaxed farmhouse look of Pottery Barn—an affordable DIY version that still feels polished and timeless. This project is perfect for a family entryway, home office, or kitchen command center and can be made using reclaimed materials and basic tools.
Years ago I used to browse Pottery Barn for inspiration, even when buying their pieces wasn’t an option. Those pages sparked ideas I could recreate with inexpensive supplies or things I already had on hand. This particular message board concept came together while preparing for a holiday craft fair. My husband and I spent months building, painting, and assembling handmade décor to sell. They sold quickly, which convinced me how popular this style can be.
Below is a clear, practical version of that original project with updated tips, so you can make a durable, attractive message board for your home.
Materials used for Pottery Barn Inspired Message Boards
- Plywood panel (size to suit your space—common sizes: 18″x24″ or 24″x36″)
- Cream-colored canvas fabric or a painter’s drop cloth
- Burlap for texture and pockets (optional)
- Heavy-duty staple gun and staples
- Jute or twine for hanging lines
- Upholstery tacks or large decorative nails
- Iron-on transfer paper and vintage postcard images (optional)
- Permanent stamp ink and rubber stamps for personalizing fabric (optional)
- Sewing machine and thread for pockets, ruffles, or sewn accents (optional)
- Wood strips for a simple frame, stained or painted
The Basics of How to Make Pottery Barn inspired Message Boards
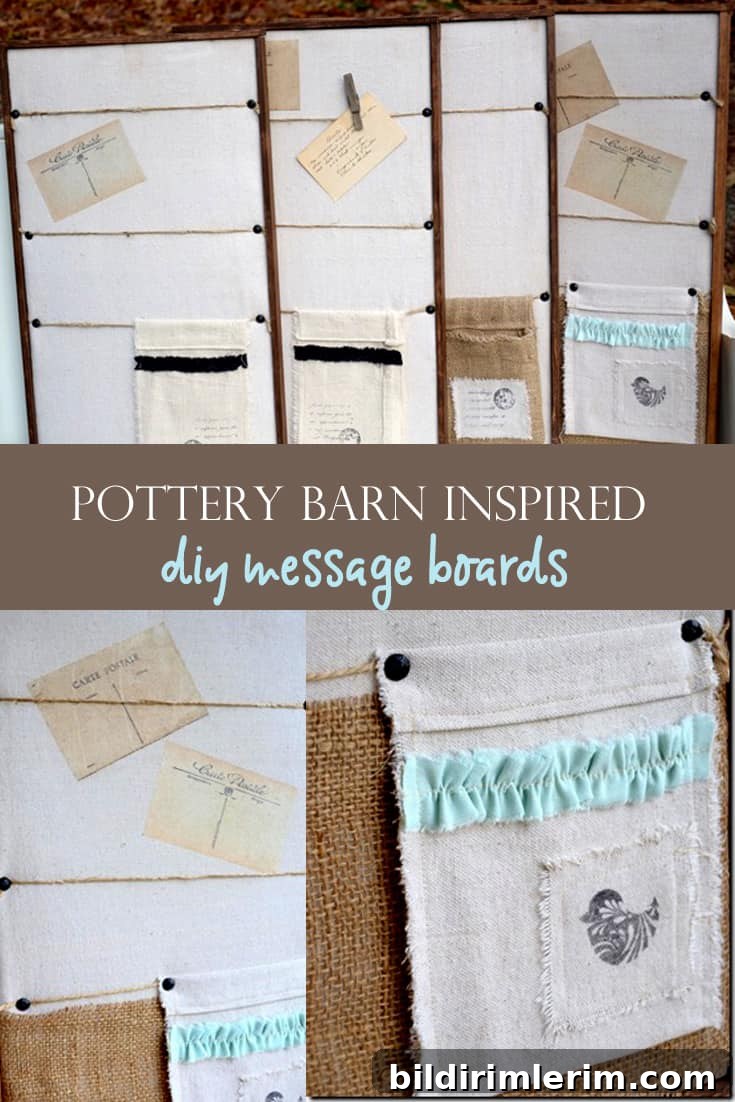
Start by cutting plywood to the desired size. Wrap the front with a cream-colored canvas or painter’s drop cloth, pulling it taut and stapling the fabric to the back of the panel. This creates a smooth, neutral background that reads as farmhouse chic.
Create the functional “lines” by knotting lengths of jute or twine and fastening them across the board with upholstery tacks. Space the jute evenly and pull it snug so notes clipped or tucked into it stay put. You can tie small knots or double-wrap the jute around the tacks for a secure hold and a decorative look.
To add visual interest and vintage charm, transfer printed postcard images onto fabric with iron-on transfer paper, then adhere those panels directly to the canvas. Alternatively, stamp directly onto sewn pockets or burlap using permanent ink for a customized touch. I used vintage postcard art on several boards; these small details create a focal point without overwhelming the piece.
I sewed small fabric pouches to hold mail and small items. Stitching pockets from burlap or canvas gives both texture and storage. If you prefer a cleaner look, skip sewn pockets and use a single burlap panel or a stitched linen pocket—either approach keeps the handmade aesthetic.
Finish the board by attaching a simple wood frame made from stained strips. A Dark Walnut stain or weathered gray paint complements the neutral fabric and burlap. My husband nailed the frame to the edges after the fabric and embellishments were secured; this gives the board a professional, finished appearance and protects the raw edges of the fabric.
For hardware, add a D-ring hanger or sawtooth hanger on the back depending on the board’s weight and where it will hang. If you want the board to be transportable for fairs or markets, consider using lightweight plywood and secure corners so it stays robust in transit.
A burlap board made from a coffee sack offers a more textured, rustic look; you can leave it as an art piece or attach a small clipboard or bulldog clip for practical use. The choice between purely decorative and purely functional is up to you—both routes work well in a farmhouse or modern country décor scheme.
Tips and variations
- Scale the board to your wall space—smaller panels work well in hallways; larger panels make a statement over a console table.
- Mix materials: canvas for a light background, burlap for texture, and stamped fabric for personalized details.
- Use decorative nails or upholstery tacks to add a vintage look and anchor the jute securely.
- Make interchangeable elements—use clips instead of sewn pockets so you can switch arrangements seasonally.
- Keep materials light if you plan to hang the board on drywall without studs; use wall anchors for heavier pieces.
Other Pottery Barn Inspired Home Decor Projects:
- DIY Pottery Barn–style headboard
- Pottery Barn inspired throw pillow tutorial
- Message center made from an old window frame
This DIY approach saves money while letting you customize size, color, and materials to match your home. It’s a satisfying weekend project that yields a practical, attractive piece you’ll use every day.