How to Make a Beach Rock Mosaic Mirror: Step-by-Step DIY Guide
I’ve admired a stunning rock mosaic mirror on my friend Adele’s kitchen wall for years, so I was thrilled when she told me she made it herself. Mosaic projects fascinated me, and this was finally my chance to try one.
Adele and her friend Jody kindly taught this craft at a recent mother-daughter weekend at the camp. The activity was a hit with our group of 45. If you’re looking for an affordable, memorable group craft—especially for moms and daughters—this project is a great option.
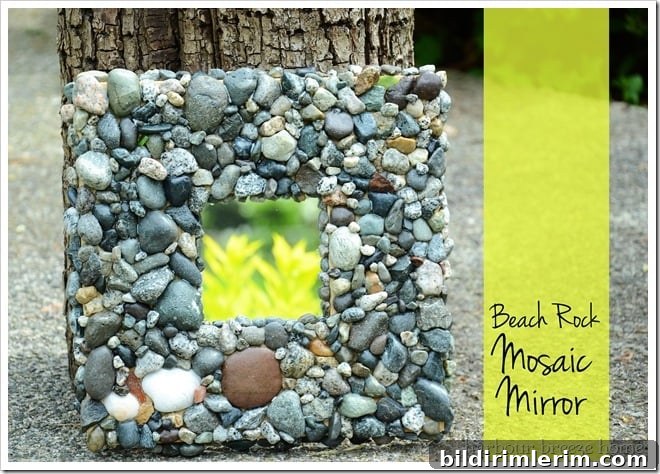
Materials you’ll need:
Mirrors with large wooden frames (we found inexpensive ones at Ikea)
Weldbond glue (one gallon was more than enough for our group)
Cottage cheese container lids or other disposable dishes for glue
Small art brushes to apply glue
Wax paper to protect your work surface
A lot of rinsed, dried beach rocks—relatively flat on the bottom and small (no larger than a loonie)
Optional: seashells and beach glass for accents
This is not a one-hour craft. Expect to spend roughly three hours from start to finish, depending on how intricate you want to be. At our event people worked on their mirrors between activities and finished at different times, but everyone completed a beautiful piece.
Adele left a mirror for me to try, and I worked on it little by little over the week. The process felt relaxing—like assembling a puzzle—and the final reveal is very satisfying.
Step 1: Lay wax paper on your table to protect the surface. This project can get messy, so a protective layer will make cleanup much easier.
Step 2: Keep the mirror flat on the table while you glue the rocks to the sides of the frame. Working flat ensures the finished mirror will sit flush against the wall. Brush the bottoms of the rocks with glue; don’t be afraid to apply a generous amount. The glue dries clear, and you want a secure bond so the rocks won’t fall off once hung.
Step 3: Move inward and glue rocks around the center section of the frame. Piecing rocks together and considering how they nest will help you achieve a natural, balanced look.
Step 4: Glue rocks along the top edge. This is where you can be creative—there’s no wrong arrangement. I started in a corner and worked my way around, fitting and gluing rocks as I went. Because our rock supply had already been picked through at the event, many of my pieces were small, which took a bit longer. Larger rocks will speed up the process.
The goal is to cover the entire visible wooden frame with rocks. To fill small gaps, paint glue into the spaces and press in tiny stones or shell fragments. Use plenty of glue—your work will look messy during gluing, but it dries clear and neat.
When all the pieces are in place, it’s as satisfying as finishing a big puzzle.
Step 5: After the rocks are firmly set, mix a sealing wash of 1 part Weldbond glue to 3 parts water. Brush this mixture over the entire rock surface. The wash dries clear and glossy, enhancing the colors and textures of the stones and unifying the finish.
Once the wash is dry, your mirror is finished. If any glue gets on the reflective surface during the process, a small amount of nail polish remover will usually remove it—test a hidden spot first and use gently.
Because the finished piece can be heavy, be sure to attach a sturdy picture hanger or other secure hanging hardware to the back and mount it firmly to the wall.
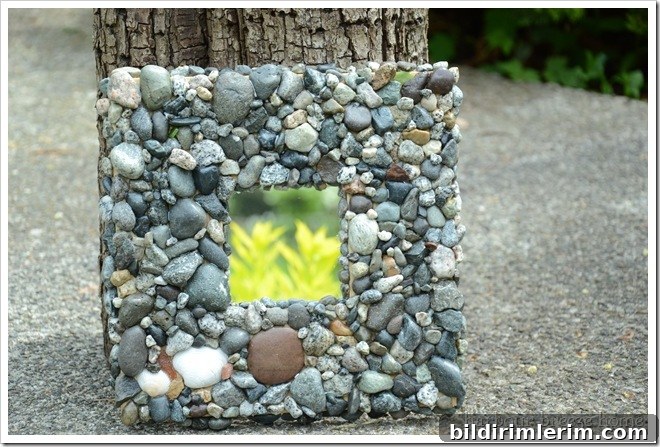
This is also a wonderful family project. Gathering rocks and shells together at the beach and then assembling them into a mirror frame makes a great shared memory and a unique piece of decor.
Enjoy the process—and happy gluing!
Linking to: Not Just a Housewife