
I love Roman shades, and when I began planning the entryway I considered making one by hand. I had an inspiration image in mind and spent some time researching the traditional method—measuring, sewing, and attaching many small rings and cords. It all sounded straightforward but time-consuming, especially for a quick entryway update.
Source: saffroniabaldwin.com via Rita on Pinterest
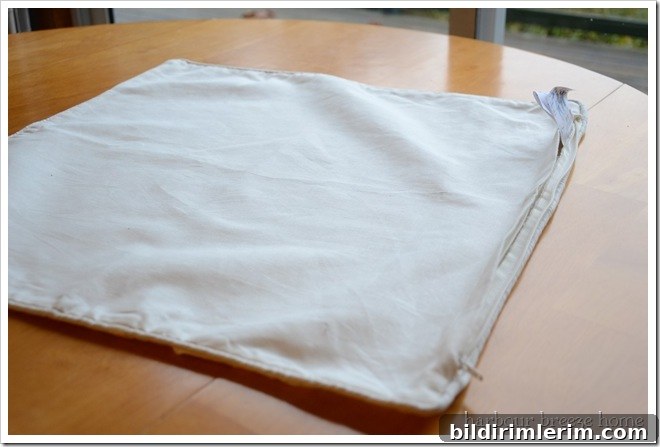
Everything changed when I rediscovered a forgotten item in my fabric drawer: an Ikea pillow cover purchased from the “as is” section a few years earlier. The color was a perfect match for the entryway, and the cover’s dimensions turned out to be ideal for the window. Instead of committing to the detailed sewing and rigging of a true Roman shade, I tried a simple, low-effort alternative that created the same soft, tailored look.
Materials and tools used: one pillow cover (large enough to cover the window), a strip of stiff white cardboard cut to the width of the fabric, three thumbtacks for the top edge, two additional tacks to shape the sides, and a pair of scissors if trimming was required. No sewing machine, no rings, no cord ladder—just a few quick steps.
Step-by-step: I cut a strip of white cardboard to match the width of the pillow cover and slid it inside the cover so it sat just beneath the zipper line. The cardboard provides a stiff header that keeps the top of the shade straight and visually crisp. Without a firm top, lightweight fabric tends to sag between tacks and looks droopy.
With the cardboard in place, I positioned the pillow cover over the window frame and secured the top edge by pressing three thumbtacks through the fabric and cardboard into the top of the frame. The tacks were placed evenly across the width to maintain a clean, balanced appearance.
Next, I zipped the pillow cover closed so the cardboard stayed hidden and secure. This also created a finished top edge without stitching or glue. From there I folded and tucked the remaining length of fabric to mimic the soft horizontal folds of a Roman shade. To hold the pleated shape, I added a single thumbtack on each side, securing the outer folds to the window frame while keeping the central portion smooth.
This method produced an attractive faux Roman shade in under five minutes. The finished look softens the entryway, adding texture and style without the commitment of a permanent window treatment. Because I left the vinyl blinds underneath, I maintained evening privacy and light control while enjoying the added visual warmth during the day.
Helpful tips and variations: Choose a pillow cover or oversized fabric panel with a medium-weight weave so it drapes nicely but still holds shape when folded. If you prefer a neater finish, use small upholstery nails or fabric tacks in a complementary color. For a less permanent option, removable adhesive hooks or Velcro can replace tacks. If the fabric is longer than needed, trim the bottom or fold it into deeper pleats for more pronounced shading. For larger windows, consider joining two covers or using a wide Ikea cushion cover.
Result: A quick, affordable DIY faux Roman shade that updates the entryway instantly. It’s an easy way to repurpose a pillow cover into a stylish window treatment that looks intentional and polished. I’m convinced Ikea didn’t expect their pillow covers to moonlight as window coverings, but this trick is perfect when you want a fast, attractive solution without sewing.