Why Every Home Should Have a Map of Its Hidden Systems
I’ve often wished that every house came with a simple, reliable map of its “guts” — the ugly but essential things hidden behind the walls: water pipes, framing studs, and electrical wiring. Knowing where those systems run would save time, money, and a lot of midnight panic.
One memorable night brought this home for me. It was about 10:30 p.m., the kids were asleep, and my husband and I were installing the very last piece of trim in our tiny bathroom. With the final whack of the hammer, water exploded from inside the wall and sprayed us both in the face. We burst into laughter at the absurdity of it, then spent the rest of the night figuring out how to repair a copper pipe under a bedside lamp.
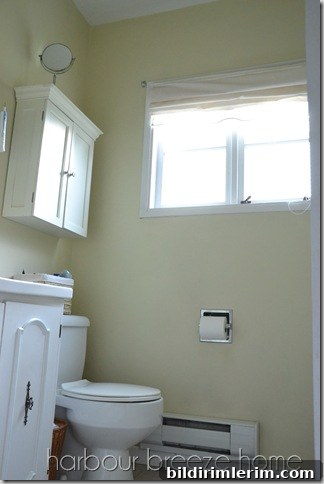
After a few sleepless hours and a messy cleanup, the lesson was clear: we needed better knowledge of what was behind our walls. When we later moved to our current house, that lesson influenced every decision. When we bought a small cupboard to install above the toilet, we planned carefully because it would be heavy and had to be secured to studs. We measured where the studs “should” be, but the usual measurements didn’t line up. We ended up drilling several test holes until we finally found the framing.
Because that wall was already opened up, we decided it was the perfect opportunity to create a simple reference. I sketched a rough diagram on paper and measured key features that would matter for future projects — the locations of studs, the positions of pipes, and the routing of visible electrical lines. Then I photographed the exposed wall and annotated the image with those measurements. One large pipe was located directly behind the center of the toilet; I’m very glad I didn’t try to hang a picture there.
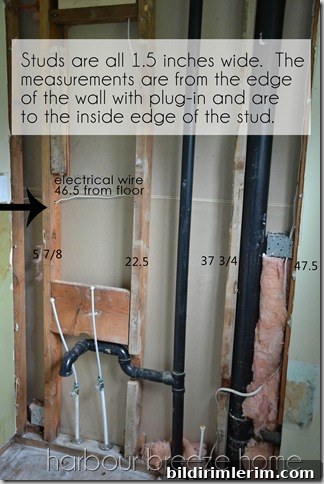
Making a simple wall map is practical and surprisingly easy. When you have a wall open for any reason, take a few minutes to:
- Note and measure the location of each stud relative to a reliable reference point (a corner, a floor line, or a fixture).
- Record visible pipes and electrical boxes, and mark their heights and horizontal positions.
- Take a clear photo of the open wall and transfer those measurements onto the image for an easy visual reference.
- Store the diagram and photos with your home records — a digital copy saved in a folder is invaluable.
These simple steps can prevent future guessing, unnecessary test holes, and worse, accidental damage to plumbing or wiring. Homeowners, renters who make improvements, and anyone who plans to hang heavy items or install shelves will benefit from having a reliable map of hidden systems.
Do homes ever come with comprehensive diagrams like this? In some newly built houses there may be plans that show major plumbing and electrical runs, but those documents aren’t always accurate to the finished installation, and they aren’t typically shared with homeowners in a practical, room-by-room format. Creating your own on-site map — whether paper, photo, or digital — is often the fastest way to get reliable, usable information.
When you’re ready to tackle a project, a wall map turns what can feel like surgery into straightforward planning. No more guessing where studs are or worrying that a nail or picture hook will hit a water pipe. It’s a small effort that can prevent big headaches — and messy surprises — down the road.
Do you keep drawings or photos of your walls and systems? If not, consider making one the next time a wall is open. It could save you from the kind of late-night plumbing adventures we’ve had.