
Create a soft, ruffled Christmas tree using an unexpected craft supply — coffee filters. You can tailor its size and silhouette using a simple cardboard cone base.
Have you heard of coffee filter crafts?
On a gray, stormy afternoon I wanted something white and delicate to set beside a newly acquired birdcage and some sparkly ornaments. Feathers and feather boas weren’t available, but I remembered a photo of a fluffy decoration made from a surprising material: coffee filters.
A stack of unused filters sat in my pantry, so I decided to experiment. The result was a soft, ruffled tree that’s quick to make, budget-friendly, and fully customizable — perfect for mantel displays, tabletops, or grouping with other handmade trees for a seasonal vignette.
How to Make a Simple Coffee Filter Christmas Tree
The concept is straightforward: form a cone from lightweight cardboard, paint it, then glue scrunched coffee filters in layers to create a full, textured tree. You can vary the cone height and diameter to make everything from tiny place-setting trees to larger centerpiece pieces.
I used an empty cereal box as the base — an easy source of lightweight cardboard that’s stiff enough to hold its shape when glued and trimmed.
Supplies Needed for this Christmas craft using coffee filters
- Lightweight cardboard (such as a cereal box)
- White acrylic paint
- Craft paintbrush or small foam brush
- Hot glue gun and hot glue sticks
- A pile of white coffee filters (plain, round style)
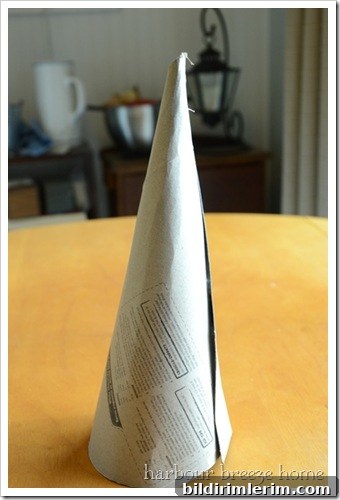
Step by step instructions for a DIY Christmas Tree with coffee filters.
- Cut a rectangle from lightweight cardboard and roll it into a cone shape. Secure the seam with hot glue, then trim the base so the cone stands upright without wobbling.
- Paint the cone with white acrylic paint and allow it to dry completely. The paint helps any cardboard show-through blend with the coffee filters and gives the finished tree a clean base color.
- Take one coffee filter and scrunch it by pinching the center and twisting the bottom so the top fluffs out into a soft round shape. The tighter you twist the bottom, the easier it is to glue in place.
- Working from the bottom edge of the cone, add a small dab of hot glue and press the twisted bottom of each coffee filter into the glue. Layer filters closely so they overlap slightly, creating a continuous ruffled look.
- As you move upward, make each successive row a little smaller so the tree tapers naturally. Continue until you reach the top and cover the cone tip with one final scrunched filter for a finished look.
- Optional: add a tiny star, a sprinkle of glitter on the filter edges, or a few miniature ornaments to personalize your tree.

Tip: Use more filters for a fuller tree. If you want a vintage or tinted look, lightly mist the filters with watered-down paint or tea before twisting and gluing — but be sure they dry before attaching to the base.
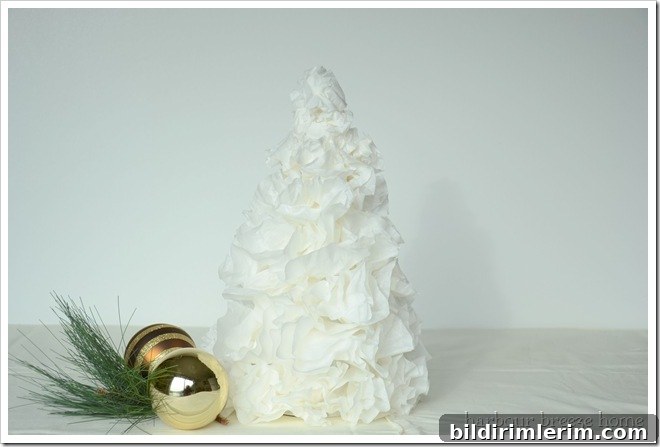
This technique creates a soft, ruffly texture that looks elegant and whimsical at once. The finished tree complements a neutral winter palette or pairs beautifully with metallic accents for festive sparkle.

When I finished my tree, my husband appreciated that there were still plenty of coffee filters left for morning coffee — a small relief after an afternoon of crafting. 
Variations and styling ideas
– Make a set of three trees in different heights for a balanced centerpiece.
– Dye some filters with soft watercolor washes for a pastel tree palette.
– Add tiny string lights or a few pearl pins for subtle sparkle.
– Use kraft or colored paper for the cone if you want a contrasting base color.
Other Christmas Tree Crafts
- How to make mini Christmas trees from Dollar Store supplies
- Fabric Christmas ornaments that turn fabric scraps into tiny trees
- A wood slice Christmas tree sign crafted from stacked wood slices
- A no-sew Christmas tree pillow for quick seasonal decor