Today marks the one-year anniversary of the kitchen remodel that reshaped our most-used room. The project began around this time last year during a bout of spring cleaning. If you’ve followed the blog from the beginning, you likely watched this transformation unfold in real time. For new readers, here’s a clear, refreshed look back at how we accomplished a budget friendly kitchen remodel that improved function and added our personal touch.
Budget Friendly Kitchen Remodel
Purpose for our kitchen remodel
We had two main goals for the renovation: increase functionality and inject personality into the space. The layout made daily tasks awkward, and the room didn’t reflect our style. With limited funds and the fact that we don’t own the house, we focused on clever, low-cost changes that deliver maximum impact.
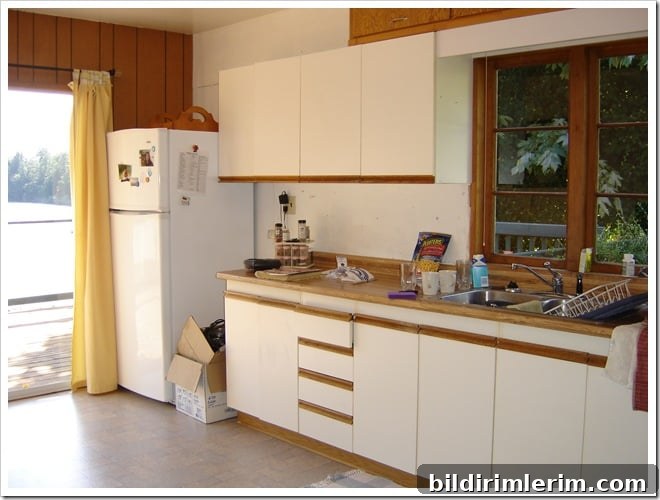
Here’s what the space looked like when we started:
When we moved in, the refrigerator squeezed into a corner and the opposite wall sat largely unused. We initially added a freestanding counter as a temporary fix, but the inefficiencies persisted.
The “pre” Kitchen Remodel
Before the full renovation, we made several small changes that improved everyday use. These early updates happened before I started blogging, so photos are limited. The pre-remodel steps included:
-
Moving the refrigerator to the opposite wall for easier access
-
Finding quality lower cabinets at a local reStore for a bargain
-
Painting the kitchen a bold Dill Pickle Green to give it character
After those initial fixes the space was already more functional, but upper cabinets were hung too high for me to reach comfortably. At 5’2″, I could only access the lowest shelf, so addressing that problem drove the next phase and ultimately changed the look of the kitchen.
What Our Budget Friendly Kitchen Remodel Included
Key changes focused on accessibility, storage, and a fresh aesthetic while keeping costs extremely low:
We removed all the upper cabinets to rethink height and function:
The previously awkward corner became a functional message center and a place to display sentimental items, improving both organization and style.
To make the upper storage reachable, we lowered the remaining cabinets, added an extra shelf, and installed crown moulding for a finished look. We decided to leave the cabinet doors off in some areas to create open shelving that feels lighter and more accessible.
On the opposite wall we applied beadboard wallpaper for texture, and where cabinet doors were missing we installed simple fabric covers to keep items contained while adding softness and color.
The Cost of our Kitchen Remodel
Every renovation reflects unique priorities. Ours prioritized affordability because our budget was limited and we were renting. We focused on repurposing materials, bargain finds, and DIY labor. The entire project cost $159.00—yes, one hundred and fifty-nine dollars. It’s proof that thoughtful, low-cost changes can transform a room’s look and usability.
I believe in using what you already have and learning to love the pieces around you. A meaningful kitchen makeover doesn’t require a huge budget—just creativity, elbow grease, and a clear plan. If you’re tackling a small kitchen remodel, consider these principles: prioritize functionality, shop secondhand for cabinetry and fixtures, paint to define mood, and use open shelving where appropriate for easier access and a lighter visual weight.
{For a complete list of the individual projects included in this renovation, see the kitchen remodel before and after post. The final wall color is Designer Gray by General Paint.}
For more Small Kitchen Remodel Ideas, check out these posts:
- Small Kitchen Remodel Ideas that won’t break the bank — our townhouse kitchen
- DIY kitchen pendant lights
- How to organize cupboards in a small kitchen
- 8 Dramatic Room Makeover Reveals Done Under $200
A Budget Friendly Room Makeover Course – FREE for you!
If you want to take on a budget friendly room makeover but aren’t sure where to begin, I created a free course that outlines five key ingredients for a successful room update. These steps will help you plan, source, and finish a space that works and feels like yours.
Click here for instant access to the free course.