
DIY Beach Rock Mosaic Mirror: Step-by-Step Guide
I’ve long admired a beautiful rock mosaic mirror on my friend Adele’s kitchen wall. When she told me, “I made that,” I was thrilled—and eager to try making one myself. Adele and her friend Jody kindly taught this project during a recent mother-daughter weekend at the camp, and it was a big hit. If you’re searching for a creative, budget-friendly craft for a group—families, moms and daughters, or friends—this beach rock mosaic mirror could be perfect.
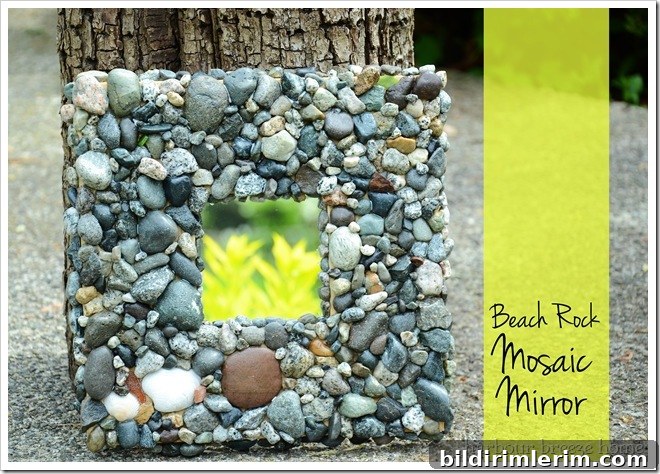
Materials You’ll Need
Gather the following supplies before you start. Most are inexpensive and easy to find:
- Mirrors with wide wooden frames (Ikea often has discounted frames; ours were $1 each)
- 1 gallon of Weldbond glue (a small amount will remain even after many participants use it)
- Small containers (cottage cheese lids work well) to hold glue
- Small art brushes for applying glue
- Wax paper to protect your work surface
- A large collection of rinsed, dried beach rocks—relatively flat on the bottom and small (no larger than a Canadian loonie)
- Optional: seashells and beach glass for accents
Note: This is not a quick one-hour craft. Adele estimates about three hours from start to finish, though people working intermittently may take longer. We offered it as a “come-and-go” station during our weekend and everyone finished at their own pace.
Preparing Your Work Area
Lay a sheet of wax paper on your table to protect the surface—this project can be messy. Arrange your rocks by size and keep glue and brushes within easy reach. Work on a flat, stable table so the mirror frame stays level while you glue.
Step-by-Step Instructions
Step 1: With the mirror laying flat, begin by gluing rocks along the inner and outer edges of the frame. Working flat ensures the finished mirror will sit flush against the wall.
Step 2: Paint the bottoms of the rocks with glue. Don’t be shy—apply a generous amount so each stone adheres securely. Weldbond dries clear, so excess looks messy while you work but will disappear when dry.
Step 3: Fill the center portion of the frame, gluing rocks into place and arranging them like a puzzle. Start from one corner or the inside edge and work outward, fitting stones together by shape and color as you go.
Step 4: Continue gluing rocks across the top and remaining frame areas. Smaller stones can be used to fill gaps; apply glue in the crevices and press teeny rocks into place. The process requires patience—filling tiny holes and finding the right pieces is part of the enjoyment.
Step 5: When the frame is completely covered and everything feels secure, prepare a clear finishing wash: mix one part Weldbond glue with three parts water. Brush this wash over the entire rock surface to seal and add a glossy finish that enhances the stones’ colors and textures.
The wash dries clear and shiny—watch as the rocks’ natural tones deepen and the mosaic comes to life. If any glue gets on the mirror surface, remove it carefully with a small amount of nail polish remover.
Finishing and Hanging
Once everything is dry, attach a strong picture-hanging system to the back. These mirrors can be quite heavy, so use a sturdy hanger or bracket and secure it properly to the wall.
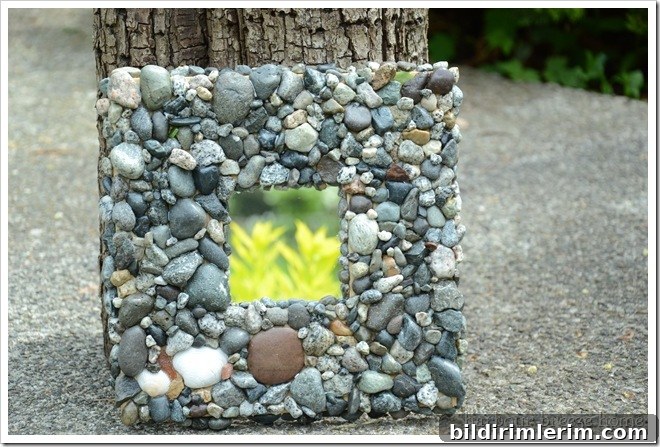
Tips and Inspiration
This is a wonderful family project—try collecting rocks and shells together at the beach for a personal touch. Larger stones speed the process, while a mix of textures and colors gives the finished mirror visual interest. Plan for time, enjoy the meditative pacing, and celebrate the moment you place the final stone.
Happy gluing!
Linking to: Not Just a Housewife