
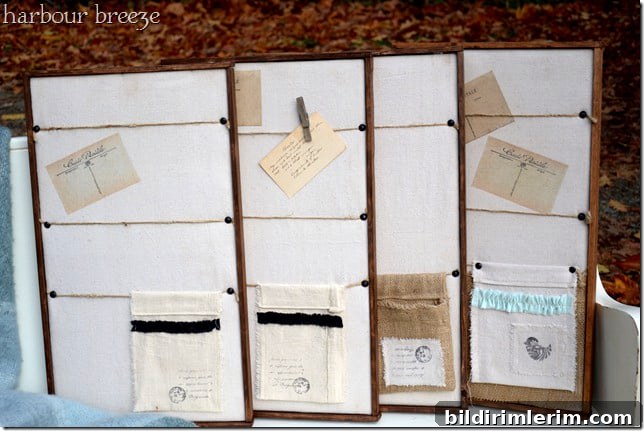
Create your own rustic message board inspired by the relaxed farmhouse style of Pottery Barn—and save money by building it yourself. This DIY version captures the same warm, lived-in look while allowing you to reuse reclaimed materials and add personal touches to match your home.
Years ago, I turned to magazine pages and brand catalogs for creative inspiration. I couldn’t always buy what I saw, but I could reinterpret those ideas using inexpensive supplies or items I already had. The Pottery Barn–style message board in this project started as a craft-fair idea, and it evolved into a simple, attractive piece that works well in entryways, kitchens, or home offices.
Materials for a Pottery Barn–Inspired Rustic Message Board
- Plywood panel (size depends on your desired finished board)
- Cream-colored canvas fabric or painter’s drop cloth
- Burlap (optional for pockets or texture)
- Staple gun and staples
- Jute or twine
- Upholstery tacks or carpet tacks
- Iron-on transfer images or vintage-style postcards (optional)
- Permanent ink and rubber stamps (optional)
- Sewing machine and thread (optional, for pockets and ruffles)
- Wood strips for a surrounding frame
- Wood stain or paint and basic finishing supplies
- Hammer and nails or brad nailer
Overview: How this DIY Message Board Comes Together
The core idea is straightforward: wrap a plywood panel with canvas or drop cloth, add horizontal lines of knotted jute to hold notes, and attach decorative pockets or postcard images for visual interest. Finish the edges with a simple stained wood frame to give it structure and a polished farmhouse look.
Step-by-Step Instructions
1. Cut the plywood to the size you want. Common sizes are 16”×24” or 18”×24” for a medium board, but choose what fits your wall space.
2. Lay the canvas or drop cloth flat, place the plywood centered on top, and pull the fabric tight around the back. Use a staple gun to secure the fabric to the back of the plywood, folding corners neatly as you would with upholstery.
3. Plan the placement of your jute lines. Mark where you want two or three horizontal rows. Measure evenly so the lines are straight and balanced.
4. Cut lengths of jute slightly longer than the width of the board. Tie small knots along the jute if you like the knotted detail, then anchor each end of the twine to the board with upholstery tacks or decorative nails. Alternatively, you can staple the jute on the back and secure it on the front with tacks for a rustic look.
5. Add pockets or ruffles made from burlap, canvas, or leftover fabric. Sew simple pouches on your machine, or glue them in place if you prefer not to sew. These pockets are great for holding mail, pens, or small notes.
6. Personalize the board with transfer images, stamped designs, or hand-lettering. If using iron-on transfers, follow the transfer instructions and apply before framing. Permanent ink stamps can add vintage or botanical accents.
7. Build a shallow frame from wood strips to finish the edges. Cut four pieces to size, stain or paint them in a tone like Dark Walnut for contrast, and attach the frame to the front edges of the board using finishing nails or a brad nailer.
Finishing Touches and Styling Tips
– For a more weathered look, dry-brush light paint over the frame or sand edges after staining.
– Use different textures—canvas, burlap, and natural twine—to create visual interest while keeping a cohesive color palette of creams, browns, and muted neutrals.
– Consider adding a small clip or vintage binder clip to one pocket for easy paper attachment, or keep it simple and leave the piece as decorative wall art.
– If you plan to hang the board in a high-traffic area, add D-ring hangers on the back and use wall anchors suitable for your wall type.
Why Make Your Own?
DIYing a Pottery Barn–inspired message board lets you control size, color, and materials while keeping costs low. You can customize pockets, add family initials or seasonal decor, and match the finished piece to your home’s modern farmhouse style. It’s a rewarding weekend project that yields a functional, attractive organizer for mail, reminders, and display items.
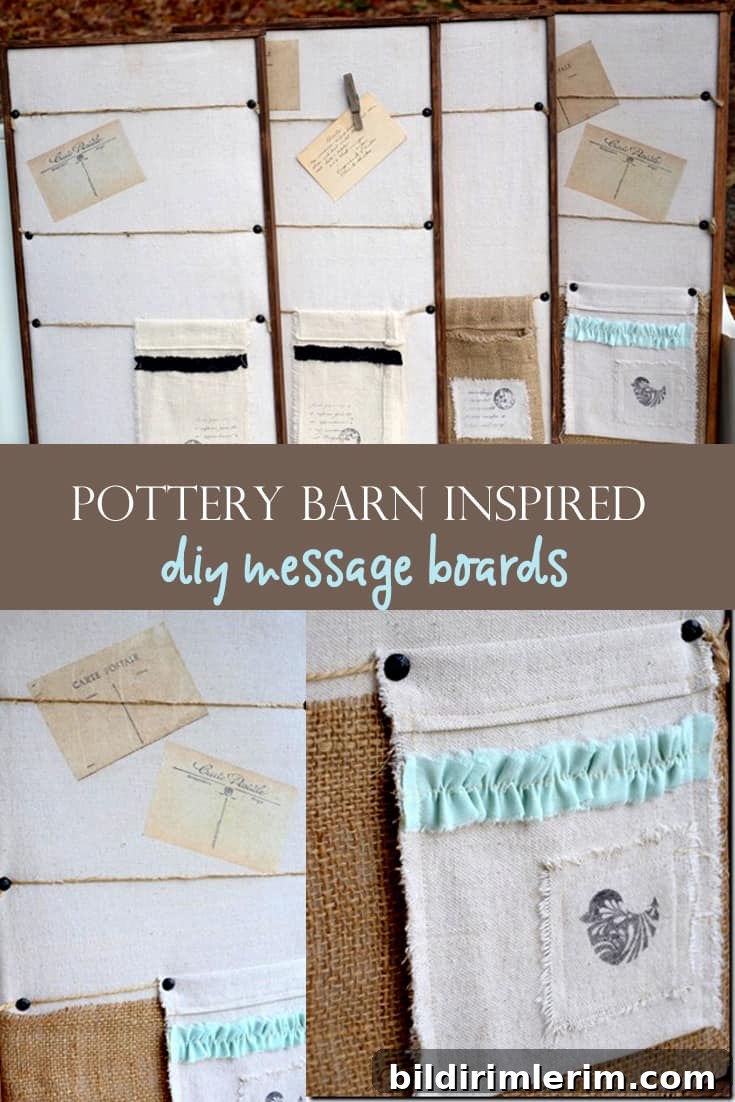
More Pottery Barn–Inspired Home Decor Ideas
- DIY Pottery Barn–style headboard
- Pottery Barn–inspired throw pillows
- Message centers made from reclaimed windows
With a few basic tools and some reclaimed materials, you can recreate the charm of high-end farmhouse decor for a fraction of the cost. This rustic message board is a practical, stylish addition to any home and a great project to adapt and personalize.