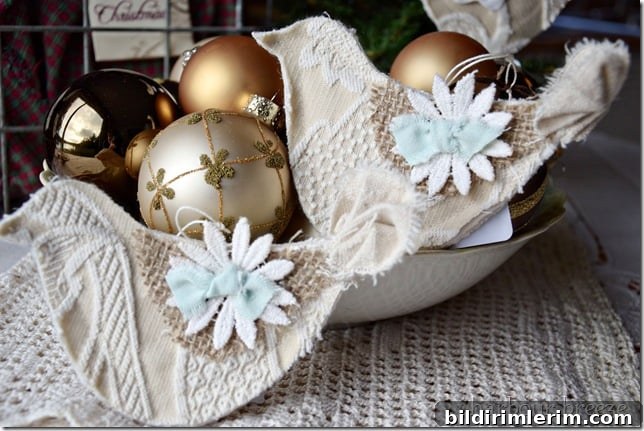
Make charming fabric bird ornaments for your Christmas tree using scrap fabric for a vintage, shabby-chic look.
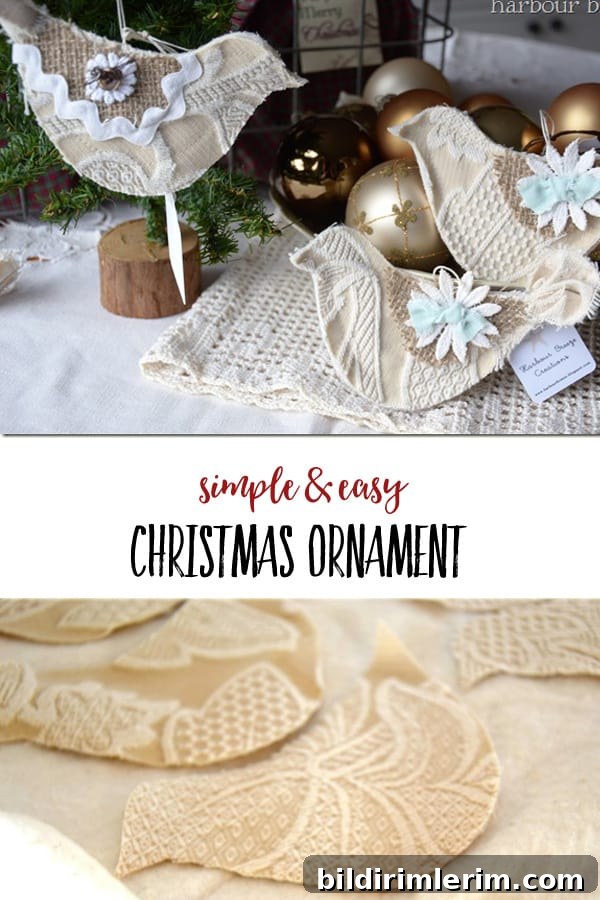
How to Make Easy Fabric Bird Ornaments
These sweet bird ornaments are ideal for a farmhouse or vintage-inspired Christmas tree. They use simple materials you may already have—fabric scraps, batting, and basic sewing supplies—and are great for making multiple ornaments in an afternoon. Below is a clear, practical guide with tips to get a neat, professional-looking finish whether you sew by machine or stitch by hand.
Supplies you’ll need
- Cardboard template of a simple bird silhouette (choose the size you prefer)
- Heavy fabric such as damask, linen, canvas, or upholstery weight scraps
- Iron-on HeatnBond or other fusible interfacing to add body
- Lightweight batting (Warm & Natural or similar)
- Fabric scissors and pins
- Sewing machine (or needle and thread for hand stitching)
- Small length of string or ribbon for hanging
- Hot glue gun and embellishments: burlap, rickrack, buttons, small fabric flowers
Step-by-step instructions
1. Create a cardboard template of a simple bird shape. Trace the template onto the reverse side of your chosen heavy fabric so markings won’t show on the right side.
2. Cut out the bird shapes carefully with sharp fabric scissors. If you plan to make several ornaments, cut multiple layers at once to save time.
3. On another piece of the same heavy fabric, fuse HeatnBond or interfacing to the wrong side using a hot iron following manufacturer instructions. This will give the ornaments structure and help them hold their shape on the tree.
4. Remove the paper backing from the fusible adhesive. Lay a sheet of lightweight batting over the adhesive side, then position the cut bird shapes on top with right sides up. The layers from bottom to top should be: damask with HeatnBond, batting, and the cut bird shape.
5. Pin through all layers to keep everything aligned. Roughly trim the excess around each bird, leaving a small seam allowance so you can easily stitch around the edges with your sewing machine.
6. Topstitch about 1/2″ from the edge of each bird. Use the sewing machine foot as a guide for consistent spacing. When you reach the top center of the bird, insert a small loop of string or ribbon between the layers and secure it in the seam so you have an instant hanger for the tree.
7. After sewing, trim the bottom batting and backing layer to match the top shape of the bird so the edges look even and tidy. Clip any tight curves carefully and avoid cutting too close to the stitching.
8. Embellish each bird to create character. Use a hot glue gun to attach burlap for wings, rickrack, fabric flowers, ribbon, or small buttons for eyes. For tails, try a torn strip of canvas folded like an accordion and glued into place, or use frayed fabric strips for a rustic texture. Keep embellishments lightweight so ornaments hang well on the tree.
Tips and variations: Make a mix of sizes and fabrics for a layered, collected look. Use muted florals, faded damask, or linen to enhance the vintage and shabby-chic aesthetic. Stitch tiny blanket stitches by hand around the edge for an old-fashioned look, or add small beads for subtle sparkle. If you prefer no-machine options, hand-sew a running stitch or whipstitch around the edge and secure the hanger loop with reinforced stitching.
Care, storage, and display ideas
These fabric birds are delicate—store them in acid-free tissue and a sturdy box to avoid crushing the batting and embellishments. Display them on a natural-branch tree, wired garland, or attached to wrapped gifts as reusable gift toppers. Because they are made from fabric scraps, they also make thoughtful, handmade gifts and can be customized by color or embellishment to match any holiday decor.
More easy DIY Christmas ornament ideas
- Fabric Christmas Ornaments – ideas for personalized trees
- DIY Book Page Star Ornaments – upcycled craft ideas
- Winter Wonderland Ornament – simple dollar-store supplies transform into seasonal decor
For more recipes, crafts & home ideas year-round, become a VIP!
Become a VIP newsletter subscriber and get instant access to a library of free printables, including wall art and gift tags. Click the sign-up image below to join.