Sharpie Mug Camp Craft — Simple, Kid-Friendly Project
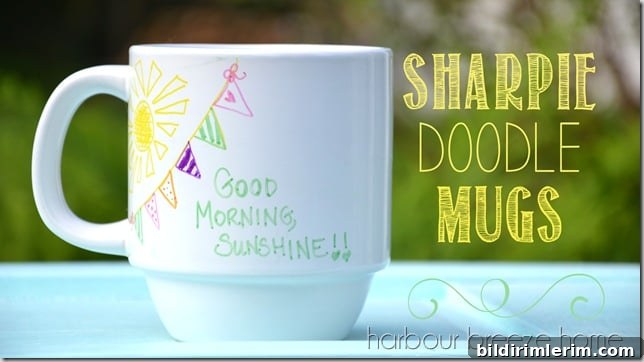
The other day I explained how I choose crafts to teach at camp. Today I want to share a super simple, popular project that our campers are already enjoying: Sharpie-decorated mugs. It’s inexpensive, fast to set up, and gives each child a personalized keepsake to take home.
Supplies
The materials are very straightforward and easy to source. You don’t need anything fancy to make attractive results.
- Rubbing alcohol and cotton balls for cleaning the mug surface
- Plain, inexpensive white mugs (discount stores are a good source)
- Assorted Sharpie markers for drawing and lettering
I experimented briefly with craft paint, but I didn’t like the look or application on these mugs, and it wiped off easily with alcohol. In short, the Sharpies gave the cleanest, most satisfying result for this activity.
To begin, wipe each mug thoroughly with rubbing alcohol using a cotton ball. This removes any dust, oils, or residues that could prevent the marker from adhering smoothly. After the surface is clean and dry, let the campers pick up the Sharpies and start drawing. The project works best when participants keep their designs simple and relaxed — this craft is about personal expression, not perfection.
Process and Practical Tips
Here are a few simple tips to help the activity run smoothly with kids:
- Set out a variety of marker colors and encourage doodles, names, simple pictures, and patterns.
- Keep the designs away from the rim where lips will touch, and suggest that campers limit decoration to the exterior body of the mug.
- Allow each mug to air dry for 24 hours after decorating before any heat-curing step.
- If you’re sending mugs home uncured, provide clear, written oven-curing instructions so the designs last longer once the family finishes them at home.
We chose to send mugs home with campers “uncured” and printed the oven-curing instructions on cardstock to tie to the handle. Punch a hole in the card and attach it with ribbon—this makes a neat take-home package and reduces the need to run the oven at camp.
“This special one-of-a-kind mug has been created with permanent Sharpie markers. Before washing it in any way, they need to be “cured” in the oven. To do so, place mug in oven. Turn oven on to 450 degrees. After oven reaches temperature, time for 30 minutes. Once 30 minutes passes, turn off the oven, but leave the mug in until completely cool or overnight. Hand washing is recommended.”
Longevity and Marker Options
This technique is widely shared online and is loved for its simplicity. There are differing opinions about which markers and methods produce the most durable results; some recommend specialty oil-based markers, while others are satisfied with standard Sharpies. Keep in mind that if the marker isn’t cured properly, the decoration may fade or wear with time and washing. Despite that, campers and adults alike usually have a blast creating a one-of-a-kind mug, and the finished pieces make meaningful gifts.
If you are working within a budget, standard Sharpie markers deliver excellent results for the cost, and the experience itself—the creativity and ownership campers feel—matters more than perfect longevity.
Final Thoughts
Sharpie mug decorating is a low-cost, high-fun craft ideal for summer camp, classrooms, or family activities. With minimal supplies, easy setup, and simple instructions, it’s a reliable project that encourages creativity and produces a personalized keepsake. Whether you cure the mugs at camp or send them home with clear instructions, this activity consistently delights participants of all ages.
(For more camp craft ideas, see the other articles and resources mentioned in the original source.)