Tired of guessing where to put nails? This simple paper-template method lets you arrange your gallery wall on the floor, transfer it to the wall precisely, and hang everything without complicated measuring.
A few years ago I spent three days at my sister Becky’s house helping redecorate and organize. Our other sister Susan came over to help as well. We worked hard, laughed a lot, and enjoyed the whole process. In the excitement I forgot to take true “before” photos, but I captured the middle and final stages so you can see how the paper-template trick made the project easy and accurate.
Becky had a large, empty wall above the couch that was perfect for a gallery wall. A gallery wall brings personality and balance to a living space, and arranging the pieces first on the floor is a low-stress way to find the best composition. Below is the step-by-step process I used — it’s fast, reliable, and saves you the hassle of guessing where to drill or hammer.
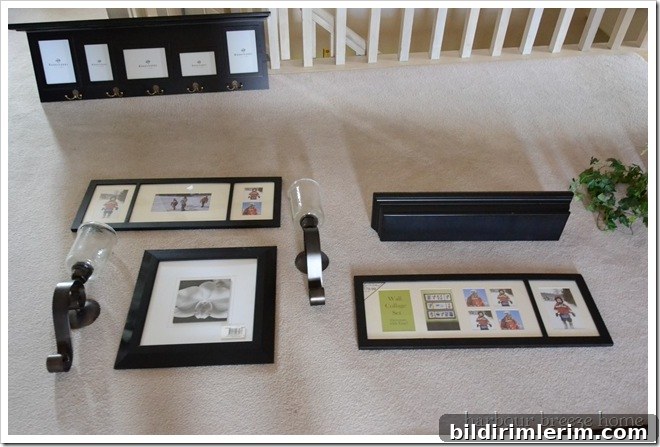
- Lay out all the items you plan to use on the floor until the arrangement feels balanced and visually pleasing. Move frames, shelves, and art around until the spacing and grouping look right to you. Working on the floor lets you experiment without making holes in the wall.
- Measure the desired overall dimensions of the finished arrangement, then cut a piece of paper to those exact dimensions. Large rolls of kraft paper, butcher paper, or even taped-together newspapers work well. Using paper that matches the scale of the wall area ensures your template will represent how the final display will sit in the space.
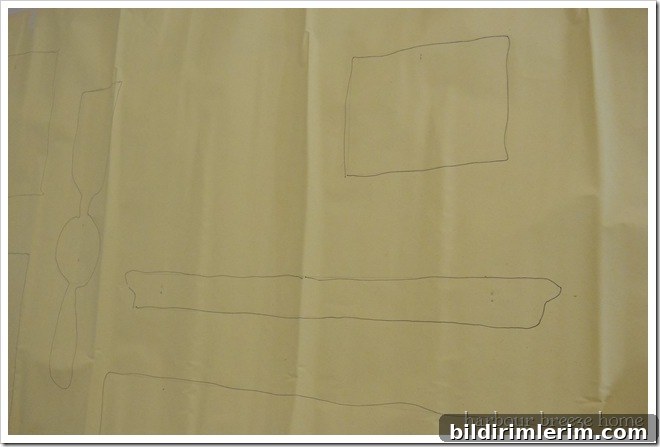
- Transfer the arrangement onto the paper by placing each framed item on top of the paper where you want it to hang. Use a level while arranging to ensure the group stays straight. Trace the outline of each item carefully so you have precise placement marks.
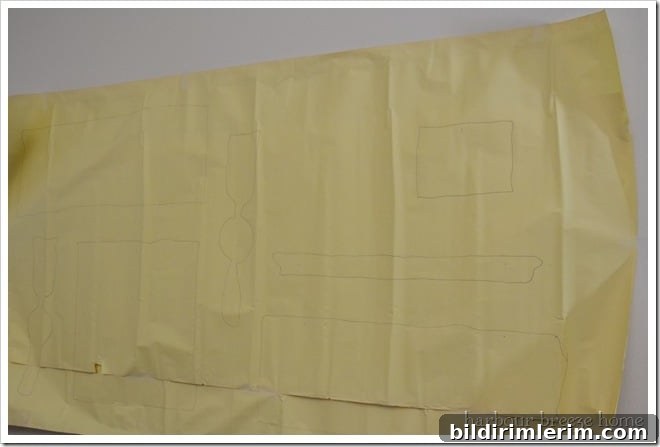
- Flip each traced item over and locate the picture hanger or mounting hardware. Mark the exact spot on the paper where the nail, screw, or anchor must be placed—usually with a small “x.” This step is especially useful when you need wall anchors for heavier pieces, because it shows you exactly where to drill before you touch the wall.
- Attach the paper template to the wall with painter’s tape or scotch tape, aligning it carefully with the space you measured earlier. Check that it’s level and positioned where you want the final arrangement to sit above furniture like a couch or console table.
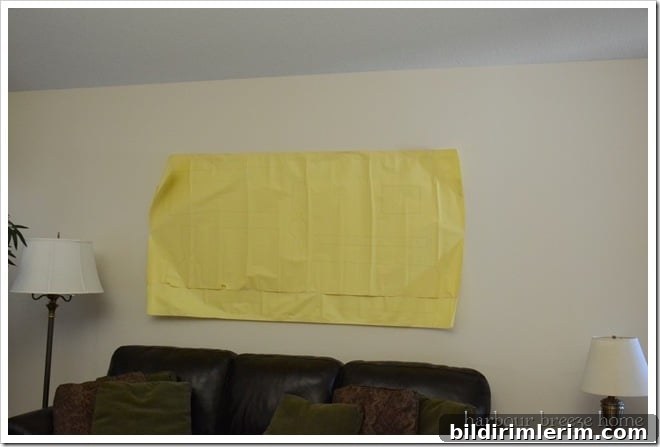
- Install nails, screws, or anchors at the exact marks you made on the paper. Use small nails for lightweight frames and anchors or screws for heavier pieces. Once every mounting point is secure, remove the paper template and hang each item in its corresponding position. This method minimizes guesswork and gives you a professional-looking result with minimal measuring.
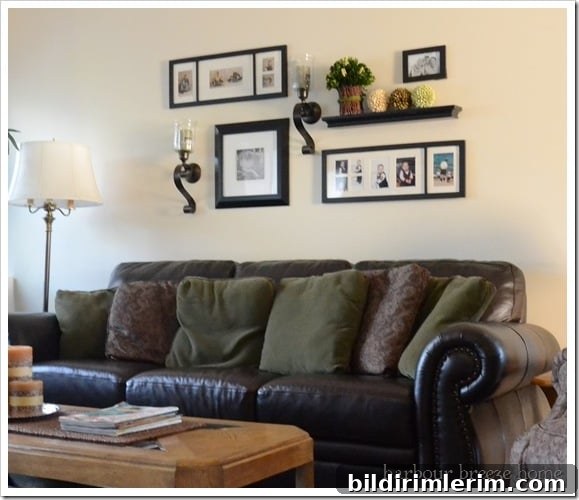
I temporarily used some family photos so the wall didn’t display strangers’ faces—Becky will finalize the selection later. The shelf that appeared in the first photo was moved to the entryway, which sits just off the living room, and it looks great there.
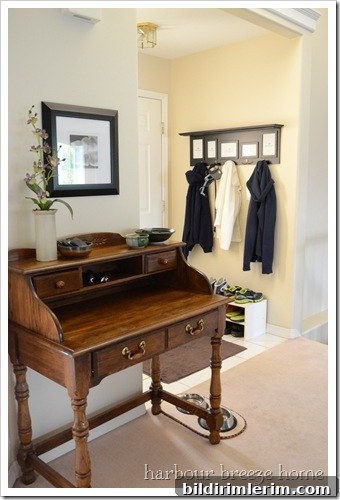
All items used in the gallery wall arrangement were purchased at Hobby Lobby, Target, and Herbergers.
Quick tip: using gridded wrapping paper or grid-lined kraft paper makes tracing and aligning even easier because the grid provides a ready-made reference for spacing and leveling. I used that approach in my own above-couch gallery wall and found it saved time while improving accuracy.
For ongoing home decor tips, craft ideas, and seasonal inspiration, consider joining the newsletter community.
Become a VIP subscriber to receive printable art, gift tags, and decorating guides delivered to your inbox. Subscribe to get instant access to the free printables library and more curated home ideas.