With everything I’ve been learning in the Shoot Fly Shoot photography course, I was excited when I came across this post on Pinterest that pointed me to useful advice on taking self-portraits.
Source: chookooloonks.com via Rita on Pinterest
Lately I’ve been thinking it’s time to update the portrait photo I’ve been using for a couple of years. I decided I would try being my own portrait guinea pig and attempt a self-portrait using Karen’s tips for taking self-portraits. Her instructions made the task sound achievable, though I knew from prior attempts that it wouldn’t be simple. Shots of women with a camera casually slung over their shoulder look effortless in photos, but getting that natural look takes practice and patience.
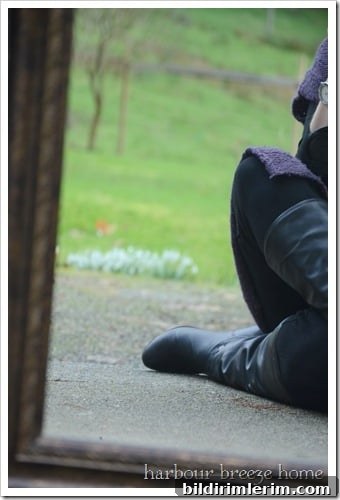
I read Karen’s steps carefully and tried to follow them closely. The first tip—take some care with your appearance—was easy to follow. I happened to be having a good hair day and put on clothes I liked. It also gave me an excuse to wear my new boots, which I love.
The next tip was to find a large, clean mirror. I have only one large mirror in the house, and it needed a good wipe. That was a small but worthwhile preparation—if the experiment failed, at least I’d have a spotless mirror when it was over.
Karen advised using a “normal” lens. For me that meant my standard lens—the only one I own at the time—though I admit I’m tempted by a 50mm, as she suggests.
Next, find good light. I moved outdoors to use natural light. It was a typical gray winter day, but a little sun was filtering through the clouds. Since it was late afternoon, I had limited time before the light faded.
The technique calls for sitting about three or four feet from the mirror and checking the background. It felt strange to perch on the sidewalk outside my front door and photograph myself reflected in the mirror. If you haven’t tried it, be prepared for how odd it feels.
One critical point is keeping the lens in the same plane as your face so your face stays in focus. Doing a self-portrait this way makes it challenging to ensure the face is sharp. I used autofocus as Karen recommended; it helped, though it sometimes struggled to decide where to lock focus.
And then—smile. Smiling at yourself in a mirror for the camera feels oddly awkward at first. It took a few tries to find a natural expression that I liked.
Karen’s last piece of advice was to shoot a lot—really a lot. She mentioned she once shot 550 frames for a self-portrait, which I initially thought was hyperbole. After trying this myself, I understood what she meant. It’s surprisingly difficult to aim the lens, ensure focus, and capture your preferred expression all at once. By the end of my session the sun had nearly set, raindrops started to fall, and I had taken over 150 photos.
Some frames were close but cropped awkwardly; others had lighting or angle issues. A few shots cut off a side of my head or missed my face entirely. Experimenting is part of the process—each imperfect frame teaches you how to adjust for the next shot.
After sorting through the shots, there was one image I liked enough to work with. Karen recommends processing your chosen image in your usual way. I don’t have a single established workflow, and I still need to learn more about Photoshop, but I applied the Pioneer Woman’s Fresh and Colorful action and made modest adjustments to light and saturation. I also cropped and added a subtle edge burn to give the portrait a finished look.
It’s not perfect, but it will do for now. I’m grateful to Karen for sharing a clear, step-by-step method for taking a self-portrait. Her guidance made the process manageable and gave me the confidence to keep experimenting until I captured a photo I’m happy with.
Linking to: My Uncommon Slice of Suburbia, Home Stories A-Z