DIY Pendant Light: Transforming a Thrifted Find into a Modern Farmhouse Fixture
I was shopping for a light to hang above the kitchen sink and kept thinking about a few favorites I’d seen recently: classic barn-style fixtures and vintage streetlight pendants. Instead of buying a new designer piece, I decided to give a thrifted find a fresh life. The result is a budget-friendly, stylish pendant that fits perfectly over the sink and echoes the modern farmhouse look I wanted.
At a local Habitat for Humanity Restore I found an old brass/gold pendant with a chain and wiring. It looked tired but promising, so I brought it home for $8. I forgot to take a before photo, but imagine a gold chain and a gold hood with a well-used finish. When our electrician saw it, he gave me a grin that said he saw potential — after he recommended replacing the wiring and the socket. There was a dated note inside that read “porcelain socket replaced 1983,” so new electrical parts were definitely needed.
Safety First: New Wiring and Socket
Before doing any cosmetic work, plan for safety. The electrician suggested installing new wiring and a new porcelain socket, and I agreed — old cords and sockets can be a fire hazard. We purchased the electrical parts and had the socket replaced, which was a small but necessary expense.
Prepping the Shade for Paint
While my husband handled the electrical pieces, I moved outdoors with spray paint. One key tip I learned is to mask the interior opening carefully so paint doesn’t get inside the shade where the bulb will sit. I covered the entire white interior with paper secured by painter’s tape, making sure to protect the threaded area and interior finish. That kept the interior clean and preserved the light’s function.
I staged the parts for painting on a glass jar and a coffee tin so each piece could be rotated without touching the wet paint. These improvised stands make spraying easier and cleaner — you can spin the parts and reach under edges while they dry.
Painting: Choice and Technique
I used oil-rubbed bronze spray paint with a satin finish, applying multiple thin coats rather than one heavy coat. I didn’t prime first and it worked well for this metal surface, but whether to prime depends on the condition and material of the fixture. Thin coats reduce drips and produce a smoother finish. Between coats, I allowed the pieces to dry thoroughly to avoid tackiness and uneven texture.
Because the piece was made of metal and the original finish was smooth, the spray paint adhered nicely and gave a rich, matte look that moves away from the shiny gold toward a more contemporary farmhouse aesthetic.
Assembly and Final Look
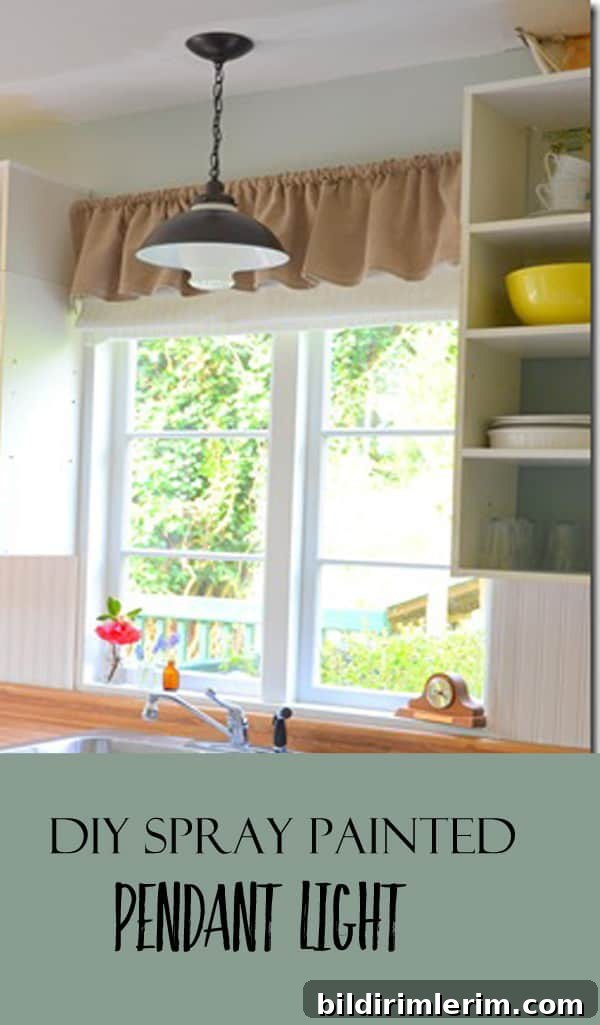
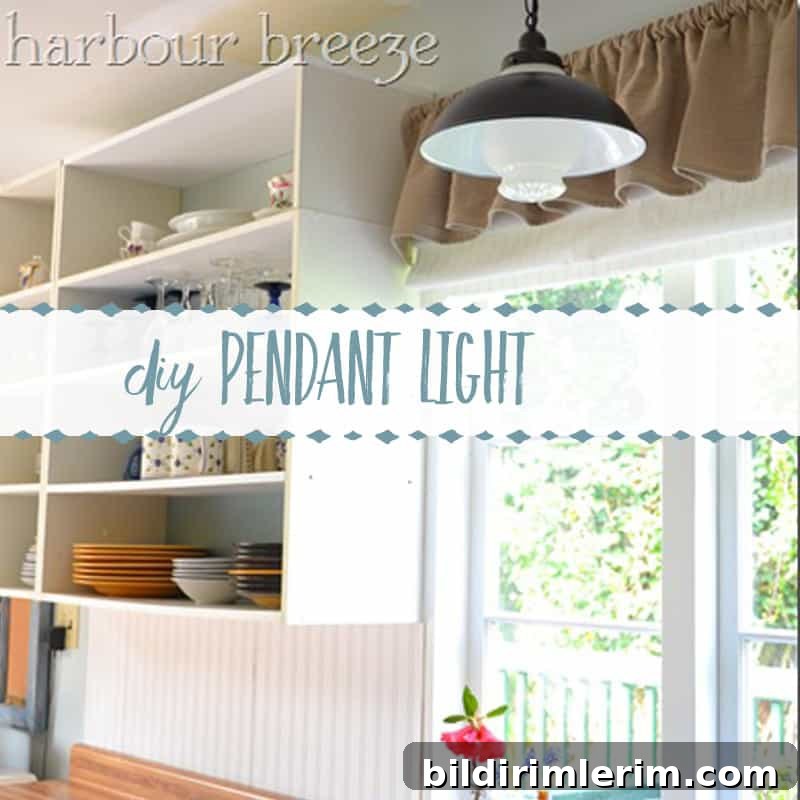
After replacing the socket, reconnecting the wiring, and reinstalling the freshly painted components, I hung the pendant above the sink. The transformation was dramatic: what had been a dated brass fixture now reads like a curated, designer pendant. It complements the kitchen without overpowering the space and provides focused light where it’s needed most.
Cost Breakdown
For those who like to see the numbers, here’s the total cost:
- Light from the Restore: $8.00
- Spray paint: already on hand
- Electrical parts (wiring and porcelain socket): $8.25 (including taxes)
Total: $16.25 — significantly less than buying a new designer pendant and a satisfying upcycle project.
Using a thrifted fixture, updating the electrical components, and applying a satin oil-rubbed bronze finish yielded a fresh, durable, and stylish pendant at a fraction of the retail price. Small creative decisions — careful masking, thin paint layers, and using household items as painting stands — made the project simple and effective.