Create striking watercolor prints using a simple painters tape technique — a fun and accessible craft for both kids and adults.
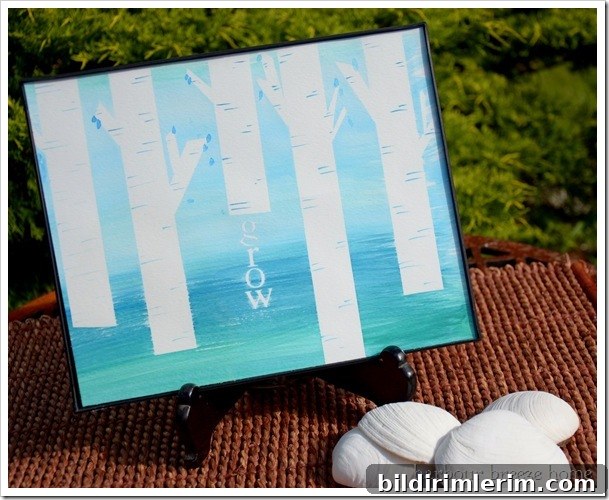
I first came across this watercolor method while searching for easy craft projects suitable for younger children at summer camp. The basic idea is clever and adaptable: use masking or painter’s tape to block off shapes or letters, paint over the exposed paper with watercolors, then remove the tape to reveal crisp, white designs. I experimented with letter stickers and various tape patterns to make initials, chevrons, and even birch tree silhouettes.
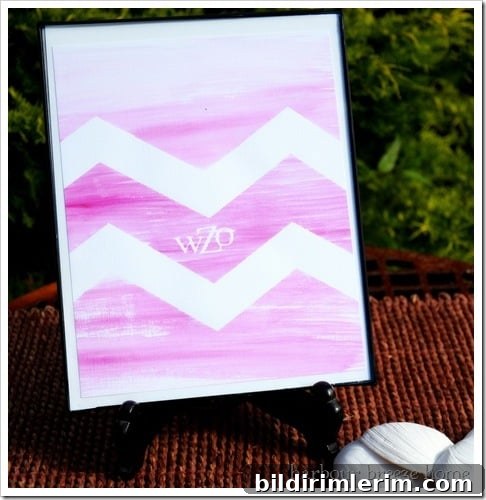
This technique is ideal for beginners because it yields attractive, graphic results with very little setup. Children especially enjoy the reveal at the end — peeling away the tape and stickers is almost as satisfying as the painting itself. For adults, the approach can be scaled up into more deliberate compositions or used to create coordinated sets of prints for framing.
Materials you will need
- Watercolor paper or heavyweight mixed-media paper
- Painters tape or masking tape (low-tack works best for easy removal)
- Letter stickers or removable adhesive shapes (optional)
- Watercolor paints and brushes
- A small container of clean water and paper towels for blotting
- Crayons (optional) if you want to try crayon-resist techniques
Step-by-step process
1. Prepare your paper by cutting it to the size you want for a print. If working with kids, smaller sheets are easier to handle.
2. Lay down strips of painter’s tape to create geometric patterns like chevrons, stripes, or borders. Press the tape edges firmly so the paint won’t seep underneath. For initials or words, apply letter stickers directly to the paper.
3. Paint over the taped area using watercolors. Allow colors to blend and run for a soft, loose look, or keep the paint controlled for cleaner color fields. Encourage children to experiment with wet-on-wet and wet-on-dry techniques to see different effects.
4. Let the paint dry partially — you can remove tape while the surface is still slightly damp for softer edges, or wait until it’s completely dry for crisp white lines. Carefully peel off the tape and stickers to reveal the masked design.
5. If desired, add fine details with a pen or a small brush once the paint is fully dry, then sign and display your finished piece.
Variations and creative ideas
- Initials and names: Use letter stickers to make personalized artwork for children’s rooms, gifts, or camp keepsakes.
- Nature motifs: Thin strips of tape can create birch tree trunks or abstract tree silhouettes when painted with vertical washes.
- Crayon resist: For very young kids, draw with a white crayon or wax crayon before painting. The wax will resist the watercolor, producing another playful reveal.
- Layering: Apply multiple rounds of masking and painting to build up complex, layered designs.
For more camp craft ideas
- Explore a wide range of watercolor painting ideas suitable for beginners and kids
- Try plaster crafts and simple mould-making projects for hands-on creativity
- Browse easy summer camp crafts that are quick to set up and fun to teach
Summer at a Camp!
Summer can be hectic, and “lazy days” are often the exception rather than the rule — especially at camp. I’m juggling responsibilities while aiming to keep sharing creative ideas here. Some days I may not post, but I’ll always return with more projects and inspiration. If you’re enjoying an easy summer afternoon, take a moment to paint with the kids or make something simple for yourself; these small, creative breaks can make a busy season feel more memorable. 
Whether you’re supervising a group of campers or crafting at home, this painter’s tape watercolor technique is forgiving, quick to set up, and reliably rewarding. It’s a great way to introduce children to watercolor basics, teach them about masking and composition, and produce attractive artwork that looks more polished than the effort required. Try a few variations, keep materials simple, and enjoy the surprise when the tape comes off.