Bathroom Renovation: Choosing a Paint Color and Celebrating Progress
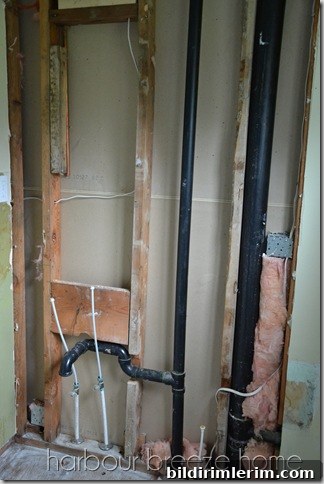
Our bathroom sat with a big hole in the wall for nearly two weeks while we waited for the electrician to return from holiday. It wasn’t ideal, but we kept the sink and toilet working during the delay so the space remained functional even while it looked unfinished.
While waiting, I grew restless and wanted to do something productive. I taped paint swatches on the wall and layered samples until the wall looked like a collage. I also spent time collecting inspiration images on my Pinterest Bathrooms inspiration board; I noticed a strong preference for blue-and-white schemes in everything I saved.
Each day I flipped between options, trying to choose a single color from dozens of contenders. Picking a final shade from a teeny paint chip is tough — colors can look very different once they cover an entire wall and react to the room’s light and finishes.
After a lot of online research and study of inspirational photos, I finally committed to a shade called Seasalt from Sherwin-Williams. We don’t have a Sherwin-Williams store nearby, so I brought the swatch to our local paint counter and had a Benjamin Moore store mix a matching color for me. The can sat unopened in the entryway for a few days while other renovation tasks moved forward.
When I started painting, I focused on the walls that were already in place. Technically painting before drywall work is fully finished is “out of order,” but I chose a practical approach: paint one wall at a time. Seeing a full wall covered in the chosen color is the best way for me to decide whether it truly works in the space.
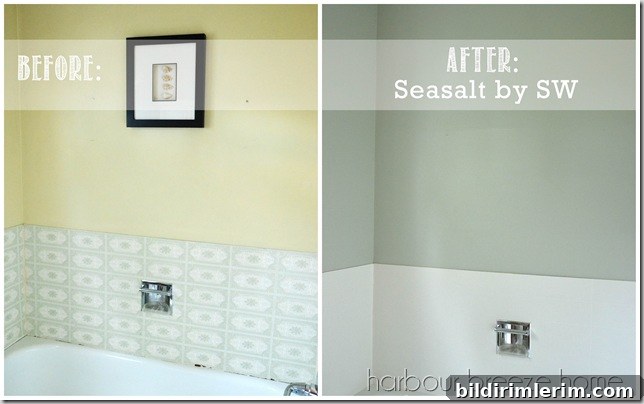
Once painted, the color felt calm and peaceful. Seasalt changes subtly with the light, shifting tones in a way that keeps the small bathroom feeling fresh rather than flat. When afternoon light hits it, the paint reads slightly cooler; in softer morning light it has a gentler, warmer cast. That kind of variability is exactly what I hoped for.
As I wrote this, my husband — who’s doing the handyman work — was sanding and applying another coat of mud to the newly drywalled section. I loved hearing the sounds of work continuing around me; renovation noise often feels like steady progress. Small steps add up quickly once you commit and keep moving.
Here are a few practical takeaways from this stage of the project that might help if you’re tackling a similar renovation:
- Test paint on a large area rather than relying only on small swatches. A full wall or a poster-board-sized sample will show how the color interacts with light and finishes.
- Be willing to paint “out of order” when it helps you make decisions. Painting one wall at a time can inspire confidence about the color and build momentum without disrupting other trades.
- Get a color match if your preferred brand isn’t available locally. Paint stores can usually mix a close match, but always test the mixed color on the wall before committing to all coats.
- Observe the paint at different times of day. Natural and artificial light can change the perceived hue and saturation substantially.
- Protect fixtures and floors, ventilate the space well while painting, and allow proper drying time between coats to avoid trapping moisture or creating tacky finishes.
Renovation requires patience, but committing to decisions — even small ones like a paint color — tends to energize the whole project. Seeing the room take shape, even before every trade is finished, makes the process feel less overwhelming and more rewarding. Progress, even in small bursts, is worth celebrating.
We’re thrilled with how the painted walls are unfolding and grateful for the steady work being done around them. The bathroom is beginning to feel like a space we chose, not just one we are fixing, and that shift in feeling makes all the waiting worthwhile.