
Camp Kitchen Day One: Slow-Roasted Sunday Beef
This summer my small home decor blog is taking a short detour while I spend the season cooking in our camp kitchen. The days here fill up fast, so I thought it would be fun to share one (or two) photos a day and write a little about what’s happening. I’m not claiming to be a professional chef—cooking has never been my main thing—but I am enjoying the rhythm of camp meals and the simple satisfaction of a well-roasted beef.
The Tradition and Why I’m Doing It
Sunday roast beef was a childhood tradition in my family. My mother would put the roast in the oven on time bake before we left for church, and we returned to a warm, fragrant meal that felt like the center of the week. I never managed to keep that ritual regularly in my own household—neither my husband nor I are big roast beef fans—so roast beef appearances have been rare over the years. Now, cooking for the camp has given me a reason to revive the method and make up for lost time.
Preparing for a Camp-Sized Roast
Today we prepared five large roasts, each roughly twenty pounds. For this scale of cooking, planning and timing are everything. My chef instructor, Connie, taught me a straightforward approach that yields consistent, tender results. The method is aimed at convenience and flavor, so you can prepare ahead and serve without last-minute stress.
Here are the steps I use in the camp kitchen, adapted for larger roasts but applicable for home cooks as well:
- Three days before cooking, place each frozen roast on the bottom shelf of a cooler or refrigerator on a large pan or tray to thaw slowly and evenly. This controlled thaw reduces moisture loss and keeps the meat safe.
- On the morning you plan to serve the roast, remove the outer plastic wrap. Apply a dry rub made from paprika, rosemary, thyme, garlic, and crushed peppercorns. I avoid adding salt to the rub at this stage, because salt can draw moisture out and potentially dry the roast during the long cook.
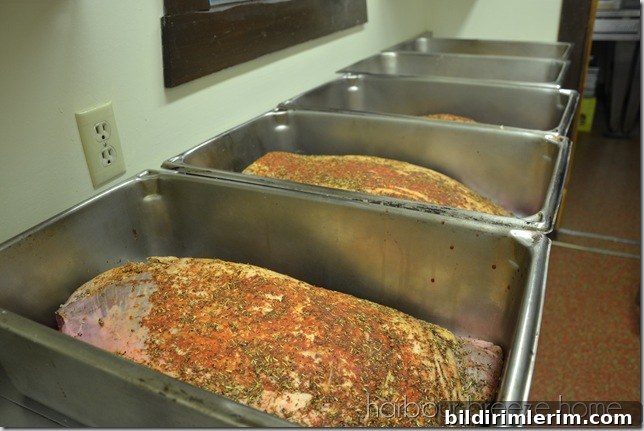
- At 10:30 a.m., place the roasts uncovered in a 450°F (232°C) oven for 30 minutes to start the browning process. This step helps develop a flavorful crust.
- After 30 minutes, reduce the oven temperature to 225°F (107°C) and continue roasting slowly. This low-and-slow finish allows the connective tissue to break down without overcooking the exterior, producing a tender interior.
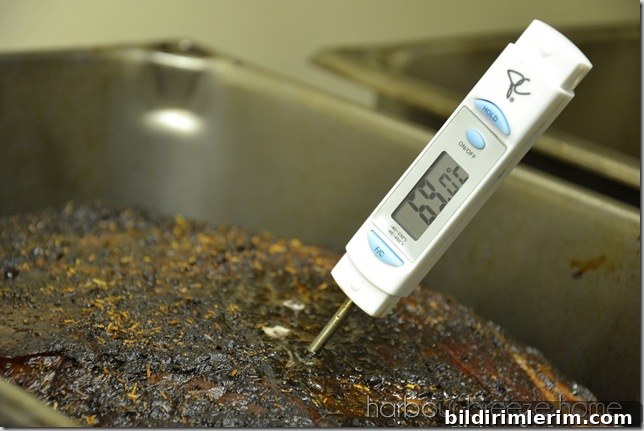
- The roasts should reach an internal temperature between 69–74°C (156–165°F) by about 3:30 in the afternoon. I monitor the internal temperature carefully to achieve the level of doneness desired while ensuring food safety.
Resting and Serving
Once the roasts reach the target temperature, cover them loosely with a foil “tent” for at least one hour. Resting allows the juices to redistribute throughout the meat, making it far easier to slice and much more tender to eat. After resting, slice the roast thinly and place the slices in a warming oven until service time. This method helps the roast remain moist and presentable for a crowd.
When cooking for a camp, cooking extra is a smart strategy. I shaved some additional slices very thin for tomorrow’s lunch: Philly cheesesteak sandwiches. Thinly shaved roast beef reheats quickly and pairs beautifully with melted cheese and sautéed onions on a soft roll.
Final Thoughts from the Camp Kitchen
Day one went smoothly—timing and teamwork made it manageable. The slow-roast approach is simple, forgiving, and scalable for large groups, and it captures the comforting spirit of a traditional Sunday roast. Over the coming days I’ll keep sharing photos and notes from the kitchen: techniques that work well in a camp setting, small changes that improve flavor, and ways to keep the workflow efficient when you’re feeding many people. If you enjoy practical, down-to-earth cooking notes and a peek at camp life, I’ll be posting daily snapshots and tips as the summer continues.