
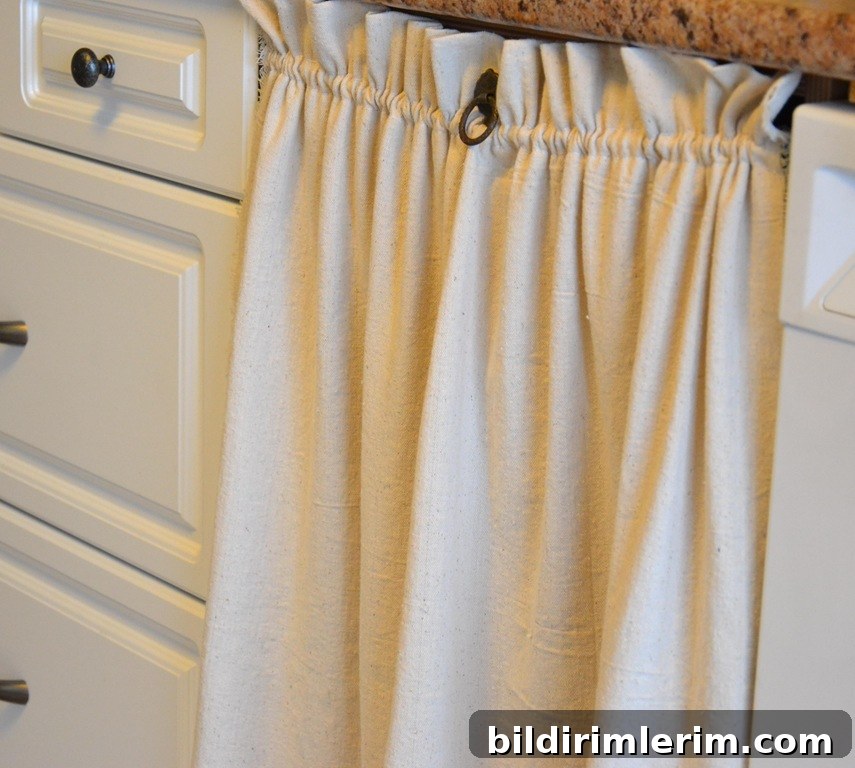
Give your kitchen a warm, vintage feel with easy-to-make cabinet curtains. This step-by-step guide explains how to make and install curtains for open base cabinets — including cupboards that have a drawer across the top.
Last year we found some great kitchen base cabinets at a local salvage shop and installed them along a wall that had been empty. We added a laminate countertop and loved the extra storage, but for almost a year the cabinet openings sat without traditional doors or drawer fronts. The savings were worth it, but I wasn’t happy with the open look long-term.

I checked the salvage shop regularly, hoping the right-sized doors or drawer fronts would appear. While waiting, I decided to make something functional and attractive: fabric cabinet curtains. The challenge was the drawers along the top — sliding a curtain aside each time to open a drawer wouldn’t be practical. The solution I developed keeps the curtain in place while still allowing the drawer to open: a rod-pocket curtain that is anchored to a small board on the drawer front and attached with a drawer pull that passes through a grommet in the fabric.
Materials Needed for Cabinet Curtains for a Cupboard with a Drawer on Top
- Fabric — Calculate the finished length you want, then add extra for the top rod pocket and a hem. For width, measure the finished width and multiply by 2 for fullness, or adjust to taste for a flatter look. Light- to medium-weight cottons, canvas, or linen-like drop cloths work well.
- Grommets — Choose grommets sized to fit the shaft of the drawer pull you plan to use. The grommet will allow the pull to pass through the curtain cleanly.
- Scrap wood cut to the width of the drawer front — this becomes the mounting surface if you don’t have a drawer front already.
- A thin rod or wire curtain system that fits inside a rod pocket and can be mounted inside the cabinet opening without bulk.
- A drawer pull or ring pull — antique or modern pulls both work; make sure the pull’s shaft fits the grommet size.

How to Make Cabinet Curtains with a Drawer Pull
Below are the practical steps I used to create these custom cabinet curtains with a drawer pull. These instructions include tips for measuring, sewing, and fastening the curtain so it looks finished and functions smoothly.
- Measure the cabinet opening and decide the finished curtain length. Add extra fabric for a bottom hem and for a rod pocket at the top. For width, allow for fullness — typically twice the finished width for a gathered look, or 1.5 times for a softer gathering. Cut and sew the curtain panels accordingly.
2. Sew a rod-pocket curtain. A simple rod pocket is made by folding the top edge down twice and stitching, leaving a channel large enough for your chosen rod or wire. For the hem, use a standard rolled hem or a wider turned hem depending on the fabric weight. I used painter’s drop cloth material that looks like canvas and linen and hemmed the bottom with a narrow rolled hem for a neat edge. To reduce bulk in the rod pocket, I left the inner edge less finished for a casual, slightly raw look that still holds up well.

3. Mark the center point of the finished curtain where the drawer pull will sit. Carefully cut a small hole at that spot and set a grommet through both layers of the rod-pocket curtain so the pull can penetrate the fabric. If you are unfamiliar with grommet setting, practice on a scrap first; a grommet setting kit is inexpensive and gives a clean, durable finish.
4. Prepare a scrap board to act as a faux drawer front if needed. Have the board cut to the exact width of the drawer opening and finish the edges so it looks tidy. Attach the board securely to the actual drawer front or drawer box, using screws from the inside so the outside remains smooth.
5. Slide the curtain rod through the rod pocket and position the curtain so the grommet aligns with the center of the drawer front. Attach the curtain and the rod assembly to the inside of the cabinet opening so the curtain hangs just below the drawer pull location. Then fasten the curtain to the scrap board on the drawer front where necessary to keep it aligned when the drawer opens and closes.

6. Insert the drawer pull through the grommet and into the drawer front or scrap board. Secure the pull according to the manufacturer’s instructions, ensuring it firmly anchors the fabric without tearing it. The pull should sit on the outside of the curtain, allowing you to open the drawer normally while the curtain remains in place.

A slim wire or tension-style rod works well inside base cabinets because it is unobtrusive and simple to install. The drawer pull passing through the grommet makes operation smooth and tidy; when you open the drawer the curtain moves with it, staying aligned and preventing the contents from being visible while keeping the vintage aesthetic intact.

Voila — a cozy, functional cabinet covering that hides cookware and adds character. The antique pull looks like a small piece of history set into the fabric, and it keeps the system working beautifully.
PS: We never ended up adding traditional doors to those cupboards. Years later, when we moved from that house, the fabric cupboard doors were still doing their job and looking great.
Tips and Variations
- Fabric choice: For a rustic look, use canvas or drop cloth. For a softer look, choose lightweight cotton or linen blends. Prewash fabric to avoid shrinkage after sewing.
- Grommet placement: Reinforce the fabric around the grommet with a small patch on the back if your fabric is lightweight to prevent tearing over time.
- Mounting options: If you prefer not to attach a board to the drawer front, you can mount the curtain to a narrow strip across the inside top of the cabinet and secure the curtain to the drawer with discreet snaps or Velcro tabs aligned with the pull.
- Care: Remove the curtain for washing as needed. Select machine-washable fabrics and finish hems to prevent fraying.
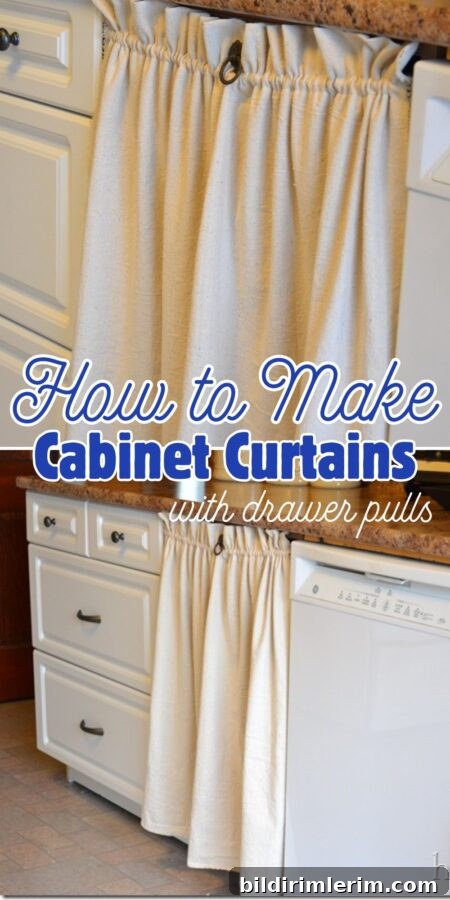
This simple DIY transforms open base cabinets into charming, functional storage without the cost of custom doors. With basic sewing skills and a few hardware pieces, you can create a durable, attractive solution tailored to your kitchen’s style.