
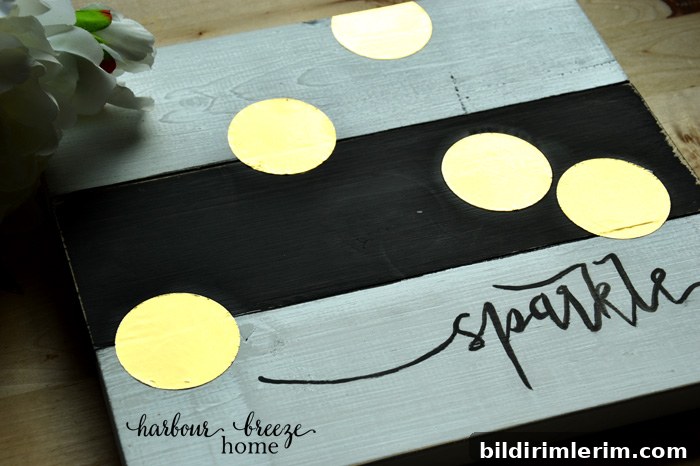
DIY “Sparkle” Sign: A Creative Risk That Paid Off
I recently overheard a conversation that stuck with me: to succeed in a creative field, you have to move beyond fear. That idea resonated. Trying something original means stepping into the unknown and accepting that the results aren’t guaranteed. My latest project—the DIY “sparkle” sign—was one of those experiments that tested patience, problem-solving, and persistence. In the end it turned out well, but not without several unexpected detours.
The idea was simple and charming: use leftover house paint to create a trendy, hand-lettered sign perfect for a girly bedroom or as a sparkly holiday gift. I envisioned a quick, stylish result that would be an easy addition to a Handmade Christmas projects series. As many DIYers know, what seems quick on paper can turn into a series of small crises—and lessons.
First snag: house paint takes far longer to dry than acrylic craft paint. I tried to hurry the process with a blow dryer, but the paint still dried slowly and remained tacky in spots. Time management is a common DIY pain point—if you want quick results, acrylics are a safer bet.
The second problem involved color. I planned a bold black stripe down the center, but my “black” house paint turned out to be a deep brown in certain light—nothing like the dramatic contrast I wanted. A tub of true black acrylic saved the day for the stripe, but because the base layer wasn’t fully cured, it still felt slightly tacky when I moved on to the lettering.
For the lettering, I used a fun modern calligraphy-style font and transferred the word “sparkle” to the painted surface. Unfortunately, graphite transfer paper smeared across the white paint, leaving black smudges. At that point I almost abandoned the sign, but I decided to adapt: sanding lightly to convert the piece into a distressed-style sign removed the smudges and added texture.
After sanding and repainting the lettering, I planned the final flourish—polka dots in metallic gold, applied through a stencil. That plan failed when the metallic paint appeared translucent and didn’t provide the shine and opacity I’d expected. It would have been easy to see the project as a loss, but improvisation saved it.
Plan X: use metallic gold scrapbooking paper instead. I punched out large circles with a circle punch and adhered them over the failed stenciling with a thin layer of liquid glass adhesive. The gold discs instantly delivered the shine and dimension the project needed. The textured, slightly distressed background combined with crisp gold dots created an appealing contrast and a finished sign that exceeded my revised expectations.
The final result? A sparkly sign that truly sparkled—and a reminder that creativity often rewards persistence. Small setbacks taught practical lessons that will improve future projects: choose fast-drying acrylics when working on a tight schedule, test paint colors on scrap wood before committing, and consider transfer alternatives that won’t smear on semi-wet paint. Also, keep a few backup embellishment options in your craft stash—scrapbook metallics and strong adhesive can be lifesavers.
If you’re planning a handmade gift or a seasonal craft, remember that creative projects are as much about problem-solving as they are about technique. Embrace the unexpected, adapt when things go wrong, and you can still end up with something beautiful. For more holiday craft inspiration and project ideas, check out the 12 Days of Handmade Christmas Ideas collection.