
Give an old veneer end table new life with this clear, step-by-step guide. You’ll find a concise supplies list, practical tips for common problems, and advice to get a smooth, long-lasting finish.
During a recent beach cottage bedroom refresh, I wanted to bring in coastal paint colors—especially a watery aqua blue, since blue is my favorite. I decided to update an old veneer nightstand that had been in my family for years. It was solid and served me well, but the dark, glossy veneer felt dated.
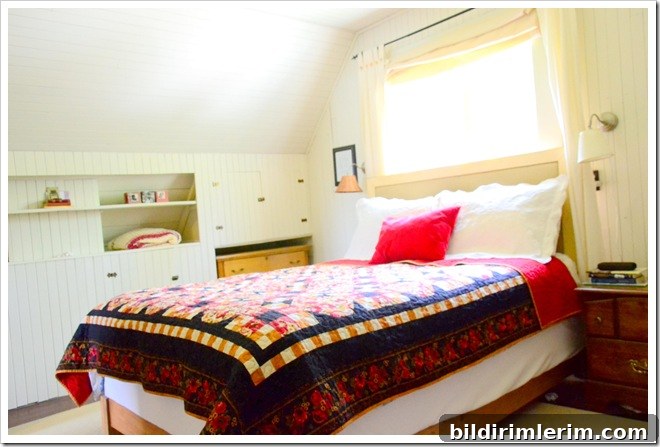
I didn’t get a great “before” photo in the rush of the makeover, but you can see the original piece in this photo:
I was a little nervous about painting the glossy veneer—veneer can be slippery for paint—but with the right prep and products, the transformation was straightforward.
Supplies You’ll Need to Paint a Veneer Cabinet (End Table)
Note: Some linked items are examples for convenience.
- Oil-based or a high-quality bonding primer formulated for laminate/veneer surfaces (or a modern water-based bonding primer recommended by your paint supplier)
- Foam brushes or inexpensive disposable brushes for applying primer
- Latex (water-based) paint in your chosen color for the top coat
- A good-quality synthetic brush for latex paint (comfortable grip and flagged bristles for smooth strokes)
- Fine-grit sandpaper (220–320 grit) for light sanding between coats
- Antiquing gel or glaze (optional) to add depth and age the finish
Step-by-Step Instructions for Painting a Veneer Cabinet, Table, or End Table
- Clean the piece thoroughly: remove dust, grease, and fingerprints using a degreasing cleaner or a mixture of mild detergent and water. Rinse and allow to dry completely—paint won’t adhere well to dirty or damp surfaces.
- Lightly sand the surface with fine-grit sandpaper to dull the gloss and create a slightly toothy surface for the primer. Wipe away sanding dust with a tack cloth or damp rag and let dry.
- Apply a bonding primer recommended for laminate or veneer surfaces. Use disposable foam brushes or an inexpensive brush for oil-based primers. Work in thin, even coats to avoid runs. If you prefer, a spray primer can provide a very even base and reduce brush marks.
- After the primer dries fully (follow manufacturer drying times), lightly sand with fine-grit sandpaper and remove dust.
- Apply the latex topcoat in long, smooth strokes. Load the brush sufficiently and work quickly but carefully to maintain even coverage. Watch for drips and smooth them out as you go.
- Let each coat dry according to the paint can instructions. Sand lightly between coats for the best finish and apply additional coats until you achieve uniform coverage.
- If desired, apply an antiquing gel or glaze selectively to add depth and a more sophisticated, aged look. Wipe off excess and blend until you’re happy with the result.
Tips for Painting Veneer Furniture
A few practical lessons I learned while repainting this nightstand:
- Spray primers can save time and deliver an even finish with fewer brush marks—especially useful on glossy veneer.
- Foam brushes break down quickly with oil-based primer. Keep extras on hand or use inexpensive bristle brushes for better durability.
- Work efficiently. Some primers and paints level and dry fast, so plan your strokes and avoid overworking the same area.
- Drips happen. If you find dried drips, sand them smooth and touch up the area. A light sanding followed by another topcoat makes them disappear.
- If hardware placement looks awkward after repainting, consider filling old holes and re-drilling for better symmetry. Small hardware changes make a big aesthetic difference.
Colors I Used for This Painted Veneer End Table
For this beach cottage look, I primed the entire piece and then painted the base and drawers with two coats of Benjamin Moore Cloud White, sanding lightly between coats. The top received two coats of Behr’s Tide Pools for that coastal aqua accent. At first the contrast felt a bit too sweet—more nursery than beach—but a dark chocolate antiquing gel added the right amount of depth and maturity, taking the piece from playful to sophisticated.
The antiquing process involved brushing a thin layer of gel into crevices and then wiping most of it away so the darker tone settled into corners and details. The result transformed the nightstand to a refined beach-cottage piece.
Final styling can hide small imperfections. I grouped a cozy afghan in a basket on top to soften the look and distract from hardware that ended up creating a “smiley face” effect—an easy lesson to remedy by filling and repositioning holes next time.
This simple makeover proves that with careful preparation, the right primer, and a few finishing touches, veneer furniture can be refreshed into a beautiful, modern piece that fits your decor.
Other Furniture Makeover Ideas
- Chalk paint bookcase makeovers
- How to strip and refinish a farmhouse table
- Painting an electric fireplace for a fresh look
- Plywood dresser turned painted dresser makeover
- Quick tips for repainting a dresser efficiently