Turn simple pieces of driftwood into stylish coastal decor with a few easy steps inspired by Pottery Barn.
Living near the water means driftwood often washes ashore, and I love turning those weathered pieces into unique home accents. Driftwood crafts are affordable, personal, and perfectly suited to nautical or beach-inspired rooms.
Turn Driftwood into Driftwood Decor!
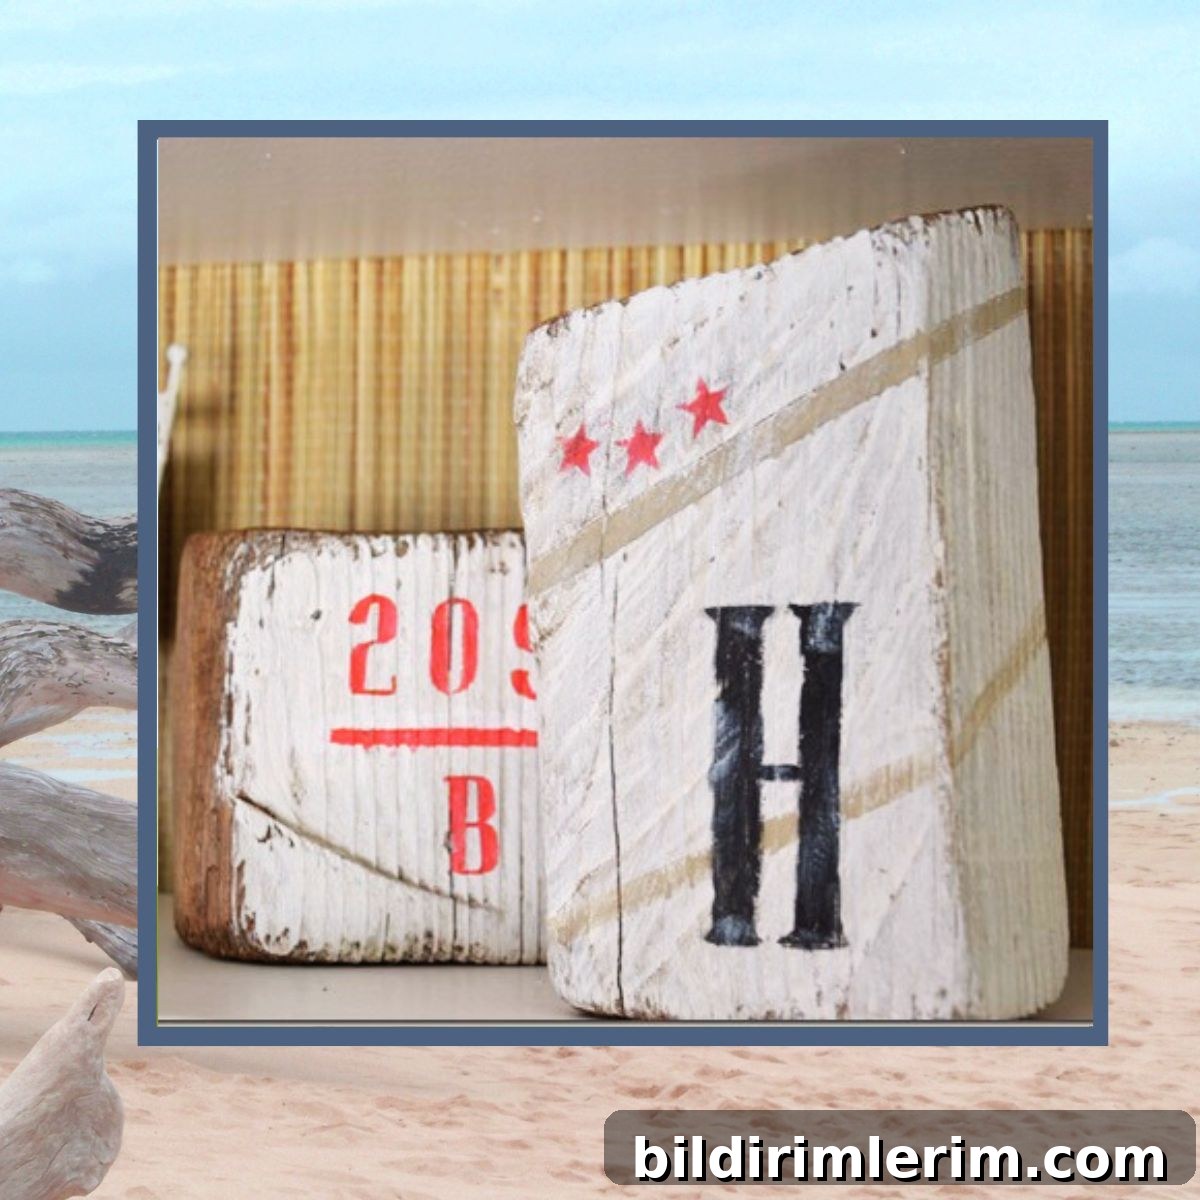
Here are two pieces I collected that had great shape and character. I wanted them to work as shelf or bookcase accents—a touch of nautical charm without feeling contrived.
For the first piece, I used a catalog cover as inspiration for a simple graphic treatment that reads like a dock or boat number. The worn texture of the wood gives the painted numbers an authentic, vintage look.
I painted the first hunk with bold numbers and a small letter beneath, keeping the palette neutral so the weathered grain of the wood still shows through. I like to imagine the numbers as the identity of an elegant yacht or an old dock post.
The second piece got a different treatment: I painted markings reminiscent of sail insignia—clean lines and a slightly uneven finish to echo the natural surface. The result is a pair of driftwood accents that read as intentionally coastal without being kitschy.
You can dress these pieces up further by attaching small boat cleats and a length of rope, or by drilling a hole to hold a tea light for a soft, ambient glow. Driftwood is versatile: a little imagination goes a long way.
How to paint on driftwood to create decor
- Clean and prepare the wood. Rinse to remove sand and salt, gently scrub with a brush if needed, and allow the piece to dry completely—ideally outdoors in the sun or in a well-ventilated area. If the wood appears to have mold, wipe it with a mild sanitizer solution and rinse thoroughly, then dry fully before proceeding.
- Sand lightly to smooth any sharp or splintered edges and to create a surface that accepts paint. Use fine-grit sandpaper and follow the natural contours so you preserve the piece’s character.
- Seal if desired. Applying a clear wood sealer or thin coat of stain can deepen the grain and protect the wood. Allow the sealer to cure according to product instructions before painting.
- Apply a base coat. Use acrylic paint for a quick-drying, durable base. A thin, even coat works well; multiple thin layers give better results than one thick coat. Wipe away excess paint from the raised grain if you want a distressed look.
- Transfer or sketch your design. Use carbon paper, a light pencil sketch, or a hand-drawn stencil to lay out numbers, letters, or motifs. Keep designs simple to complement the wood’s natural texture.
- Paint the design. Use small brushes for crisp lines and let each color dry before adding another. For an aged appearance, sand lightly over the painted areas once dry, or blend with a light wash of diluted paint.
- Finish and protect. Seal the final painted piece with a clear matte or satin varnish to protect the surface from dust and fading. For items that will sit near light or humidity, choose a sealer designed for those conditions.
Other Driftwood Decor Ideas
- Driftwood welcome sign with simple typography
- Painted sand dollar motif on a driftwood plaque
- Driftwood display arranged on a bookcase or shelf
- More driftwood decor and DIY inspiration for coastal interiors
- Driftwood wall sign, such as a custom “Lake House” or coastal nameplate
Driftwood projects are ideal for beginners and seasoned crafters alike. Because each piece of wood is unique, every finished item is one-of-a-kind. Start with small accents like the ones described here, experiment with different paints and finishes, and build a collection of rustic, coastal pieces that reflect your personal style.