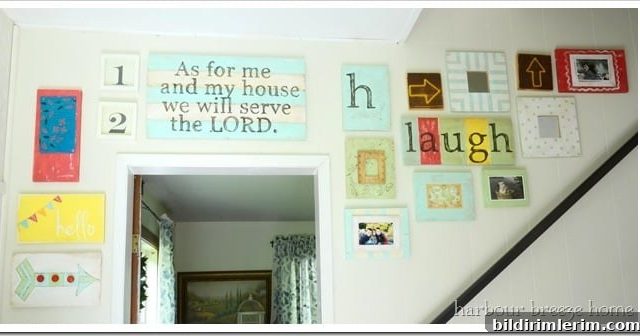
I first became aware of gallery walls after seeing Shelley’s beautifully arranged display at the House of Smiths. That roomful of mixed frames, vivid colors and layered pieces instantly caught my eye and started me on a long-lasting love affair with grouped wall art.
Gallery walls are an effective, stylish way to fill a large, empty wall. By grouping photos, prints, mirrors and found objects, you can create the visual impact of a single, large focal piece while maintaining the interest and detail of many smaller elements.
I’m especially drawn to arrangements that combine color and contrast—think aqua paired with yellow—or that use a consistent framing palette to tie eclectic pieces together. Collections of mirrors, for example, bring light into a room and introduce reflections that change with the day. Adding typography pieces, whether a single meaningful word or a cluster of lettered prints, gives a gallery wall personality and voice.
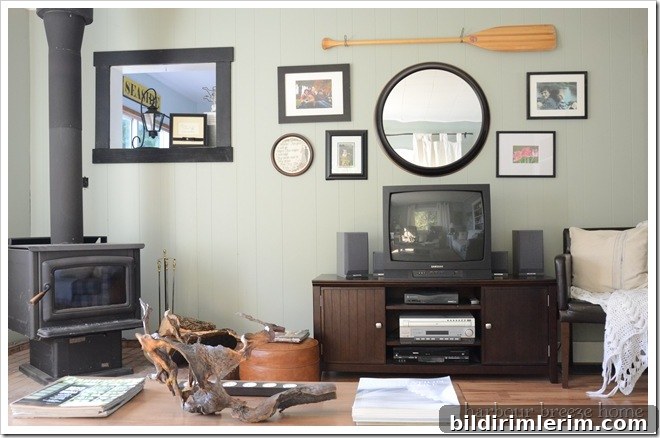
In our living room I created a simple variation of a gallery wall to fill a big expanse and to disguise an awkward pass-through window. It solved both problems: the arrangement feels intentional, and the odd architectural element blends into the composition. (See the image below.)
Gallery Wall Ideas and Planning Tips
Whether you’re assembling family photos, framed prints, vintage finds or a mix of mirrors and text, a few planning steps make the process smoother and the result more cohesive:
- Decide on a focal point: choose one central piece to anchor the arrangement—this could be your largest frame, a mirror, or a bold piece of art.
- Choose a consistent element: match frames, mat colors, or a selected palette to create unity among diverse pieces.
- Mix sizes and shapes: combine small squares, larger rectangles and circular mirrors to keep the display dynamic. Varying scale creates rhythm and movement.
- Keep spacing consistent: uniform spacing (often 2–4 inches) between frames gives a clean, intentional look.
- Consider eye level: the visual center of the grouping typically sits around 57–60 inches from the floor in living areas, but adjust to your room and furniture height.
- Use templates: cut paper templates of each frame and arrange them on the floor or tape them to the wall to preview placement before making holes.
- Balance symmetry and asymmetry: a symmetrical grid feels formal and orderly, while an asymmetrical cluster can feel more organic and modern.
Hanging and Hardware Tips
Good hanging technique prevents crooked frames and reduces wall damage:
- Lay out your design on the floor first, then transfer to the wall using paper templates and painter’s tape.
- Use a level to align top lines or centers, and measure consistently so spacing stays even throughout the arrangement.
- Choose appropriate wall anchors or picture hooks for the weight of each piece; heavier items need sturdier anchors and possibly two hanging points for stability.
- Start with the anchor piece and build outward. Stepping back frequently helps you maintain balance across the grouping.
Styling Variations
Gallery walls can reflect many styles and functions:
- Photo-focused: a family photo wall with matching frames and mats gives a classic, cohesive look.
- Eclectic mix: vintage frames, found objects and small sculptures lend a collected-over-time feel.
- Mirror cluster: a set of different-sized mirrors brightens a room and adds depth.
- Typographic accents: words or lettered prints can add humor, inspiration, or a clear theme.
Gallery walls are a flexible, creative way to personalize a space. Start with inspiration, plan carefully, and don’t be afraid to tweak placement as you go—often the best compositions reveal themselves through a little rearrangement. Above all, choose pieces that speak to you so the finished wall feels uniquely yours.